VideoPad is a free and beginner-friendly video editing package that makes an ideal replacement for the defunct Windows Movie Maker. In just a few minutes you’ll have mastered its well designed toolkit and be ready to start creating your own masterpiece ready to upload straight to YouTube or Facebook, or in a format optimized for any playback device. If you are a VideoPad new beginner, here, we will tell you how to import and edit the video in VideoPad.
First: Import the Video to VideoPad
Most users meet the big trouble when they import the videos to VideoPad due to the video incompatibility. You can refer to the following list. If your videos are not compatible with the VideoPad, you need to convert the video to VideoPad suported videos with the third video converter, like the Pavtube Video Converter Ultimate, a professional video converter, you can load any videos you want to edit, and choose any videos that VideoPad can support, there are 300+ video formats are here which is enough for you. You even can load the DVD and Blu-ray, then convert the DVD and Blu-ray to VideoPad supported videos. Quick Guide is below:
- VideoPad default file extension associations: vpg file icon.vpgvpj file icon.vpj
- Common file extensions used by VideoPad: 3gp, aac, .aiff, avi, flac, m4a, midi, mov, mp3, mp4, mpeg, ogg, wav, wmv
- Other file extensions associated with VideoPad: mid file icon.midvox file icon.voxwave file icon.wave
Quick Guide: Converter video and audio to VideoPad
1. Open this video converter and laod the video or the audios you want to convert, you can drag the videos to it directly.
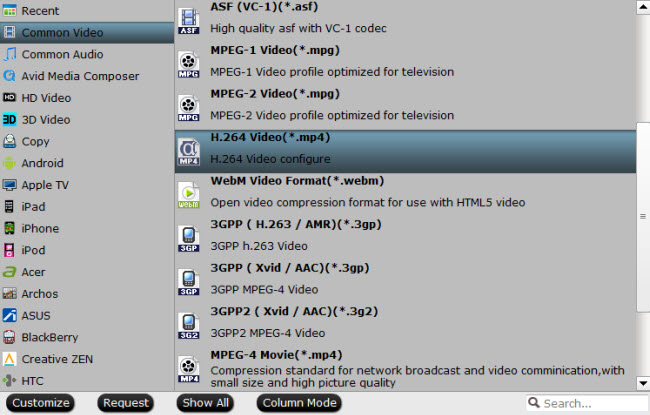
2. Click Format button and select the videos you want, you can choose the WMV, MP4 from the Common Video, you also can get the HD MP4 form the HD Video.
3. Press the Convert button to start the video conversion
Second: Edit the Video on VideoPad
When you get the VideoPad desired video formats and import the video to VideoPad, you can take full use of the VideoPad editing features and edit the video happily.
Adding and Removing Clips
Start your project by adding files to the media list area. Each file you add to VideoPad is considered to be a “clip”. To add video files to VideoPad, either click the “Add Media” button on the toolbar, or select “File -> Capture Video” from the menu. Browse to your video files, select the files you wish to use and click “Open”.
Once your files have been added, if you wish to remove any of them, right click on the files and select “Remove items” from the menu.
Using the Clip Preview Area
When you select a clip in the media list area, the clip will become available to edit in the “clip preview area”. Here you can control the playback of the clip by clicking the Play/back/forward buttons. You can also jump to a position in the clip by dragging your cursor along the timeline whilst holding down the left mouse button.
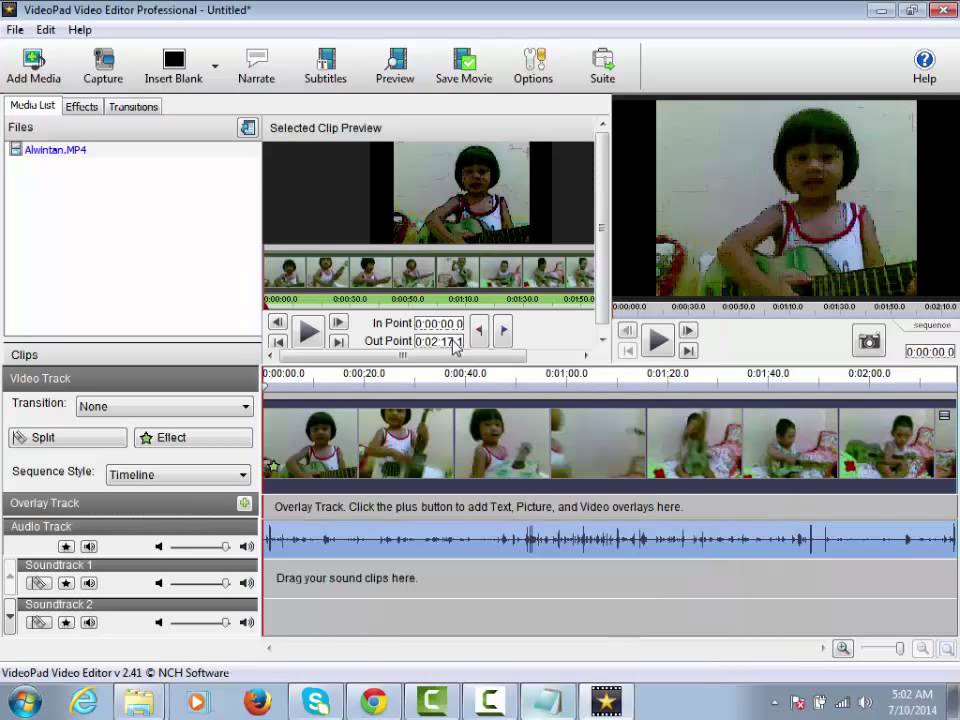
Adjusting the In / Out Points of a Clip
If you need a particular section of your video clip, you can use the red and blue flags to set “In” and “Out” points (or press “Ctrl+,” and “Ctrl+.” hot keys). These flags define the beginning and end of the clip once it is added to the sequence.
You can also “cut” new clips out of an existing clip by clicking the “Save as new clip” button to the right of the In / Out flags (icon of video file with star in top right corner). When clicked, you will see a new clip has been created and added to the media list area.
Placing clips on the Sequence
The first is from the media list area. Just select your clip in the list and with the left mouse button pushed, drag it down onto the Sequence area. Alternatively, you can right click on the selected clip and choose “Add Items to Sequence” from the menu. Your clip has now been added to the Sequence and is part of your project.
The second way to add clips to the Sequence is from the clip preview area. On the clip preview area’s toolbar, click the “Add clip to sequence” button (green, downward pointing arrow) to the right of the “Save as new clip” button. Your clip has now been added to the end of your Sequence and is part of your project.
Hope you can enjoy a happy video editing experience on VideoPad.
 Pavtube New Official Site