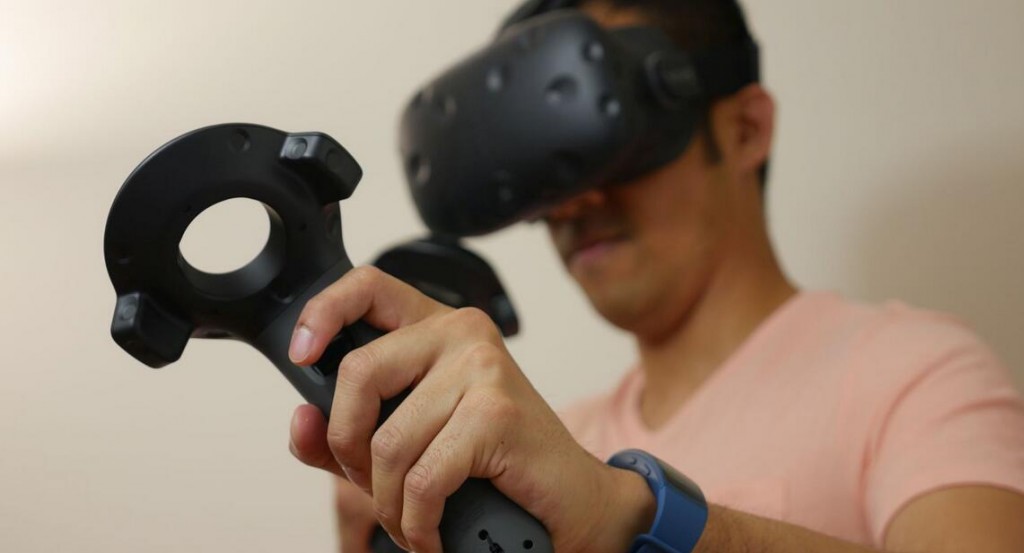
A long time ago, when the conception of Virtual Reality was raised, Samsung Gear VR has been so hot among all VR Headsets. But now, HTC Vive will be the flagship in the market with better immersive video-watching experience. If you have a HTC Vive, too, you maybe want to get some 3D movies for your HTC Vive. What 3D source can be better than your 3D Blu-ray? If you rip your 3D Blu-ray to an SBS file, then you can watch the 3D Blu-ray movies on HTC Vive using Virtual Desktop or Whirlgig.
So how to rip 3D Blu-ray to HTC Vive playable 3D video? You need a 3D Software to help you extract 3D content from 3D Blu-ray for HTC Vive. Do a reseatch on the network to find the ripping software that is suitable for you.
Best 3D Blu-ray Ripper for HTC Vive Recommended
Pavtube Video Converter Ultimate is an all-in-one workflow for HTC Vive. With it, you never need to worry about the 3D content for HTC Vive playback. You can create 3D SBS video for HTC Vive out of various source and adjust A/V parameters to fit in your HTC Vive specification to get better 3D effect on the VR video player in HTC Vive. You even can trim video footage, crop video black area, add external subtitles to video, replace audio from video, etc. Now, let’s see the 3D functions that can be used for HTC Vive in detail
– Remove Blu-ray AACS, BD+ up to MKB v62 to convert 3D Blu-ray to 3D MKV/MP4 for HTC Vive.
– Rip 2D Blu-ray to 3D SBS MKV/MP4/MOV/AVI/WMV video for HTC Vive.
– Convert DVD to 3D SBS video for HTC Vive.
– Convert 2D/ 3D MKV to 3D MP4 for HTC Vive.
– Transcode FLV, WMV, AVI, TS, MTS, AVCHD, MXF, ISO to 3D SBS video for HTC Vive.
– Remux 3D video to HTC Vive only changing original 3D video’s audio codec.
– Make you adjust 3D depth and choose Full SBS or HSBS.
The 3D SBS videos from 3D Blu-ray also can be used on Oculus Rift CV1, Samsung Gear VR, PlayStation VR, Oculus Rift DK2, Homido VR and other VR Headsets and 3D TVs. If you are using a Mac, you can get mac version to convert 3D Blu-ray to HTC Vive.
Free download and install


How to Convert 3D Blu-ray to 3D SBS for HTC Vive?
Step 1. Load 3D Blu-ray files
Launch the 3D Blu-ray Ripper for HTC Vive. Click “Load from disc” button on the main interface to load your media files to the program. Blu-ray folder is also supported. All of your loved 2D/3D Blu-ray movies such as Avatar, The Walking Dead, The Martian, Spectre 007, etc can be loaded into the software to rip for your HTC Vive streaming.

Step 2. Select output 3D format
HTC Vive can accept 3D SBS MP4 so you can click “Format” bar on the interface then navigate to “3D Video” to choose “MP4 Side-by-Side 3D Video (*.mp4)”, “MP4 Anaglyph 3D Video (*.mp4)” or “MP4 Top bottom 3D Video (*.mp4)” as the output format.

Tip: Simply click Settings bar and you can tweak the settings to your satisfaction. With the right settings you can retain the quality of the original videos while also saving space.
Step 3. Start to convert 3D Blu-ray to SBS 3D MKV/MP4 for HTC Vive
Click “Convert” to accomplish the rest process of 3D Blu-ray to HTC Vive conversion automatically. Once the ripping ends, you can open the output folder to locate the 3D SBS video for HTC Vive. Then, you can set up your HTC Video to view your 3D movie on HTC Vive. For those who don’t know how to watch 3D videos on HTC Vive, I have searched a step-by-step guide for you on howtogeek.com and have extracted the important part for you at below.
How to Watch 3D Video on HTC Vive?
There are a few different apps for watching videos in HTC Vive, but after testing a few, we settled on Whirligig. You can download an old free version on their web site, or get the $4 version on Steam, which gets occasional updates, improvements, and new features. I definitely recommend buying the $4 version, but you can try out the free version to see if it’s your cup of tea first. (Note that the free version may stutter when playing large files.)
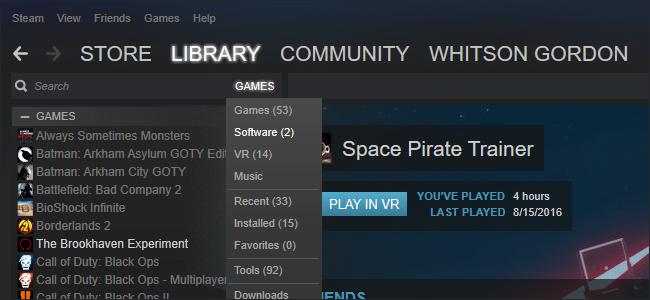
So, after buying Whirligig, open Steam, head to the Library tab, and click “Games” in the upper right-corner of the sidebar. Click “Software” to find Whirligig in your Library.
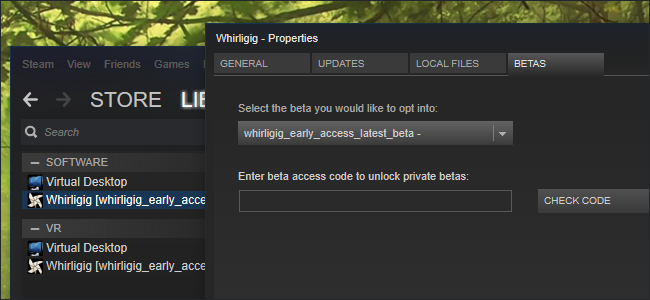
Then, right-click on Whirligig in Steam’s sidebar, and go to Properties. Click the “Betas” tab, and opt into the latest beta in the dropdown menu. Whirligig will update to the latest possible version.
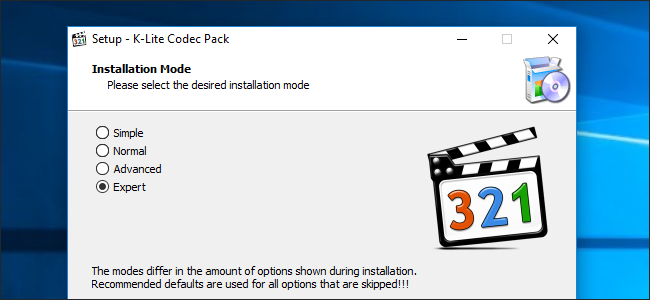
Lastly, depending on the videos you plan to watch, you may need to download and install the K-Lite Codec Pack. I recommend installing the Basic version. Be sure to click the “Expert” radio button and pay close attention–K-Lite does come bundled with crapware, you just need to decline to install it during the wizard.
Once that’s done, launch Whirligig in your VR environment of choice, and you’ll be presented with Whirligig’s heads-up overlay. You can control Whirligig’s menus with the HTC Vive’s touchpad, an Xbox 360 or One controller, or a mouse and keyboard. I highly recommend using a mouse and keyboard, as it’s much easier than any of the gamepads.
To watch a video, click the Browse button in the top left-hand corner of the menu. You’ll be able to browse your hard drive to choose a video file. (Whirligig also claims to support YouTube links in its Settings, but I couldn’t get that to work at the time of this writing.)
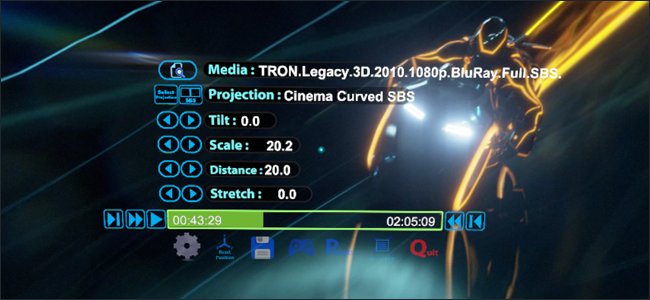
As the video starts to play, you’ll probably want to adjust some settings using Whirligig’s heads-up controls. Here’s what we recommend for each type of video:
- Regular 2D video: Set Projector to Cinema or Cinema Curved.
- 3D video: 3D video comes in a few different forms, so check the video you downloaded–or the settings you used when you ripped it–to see whether it’s Half Side-By-Side, Full Side-By-Side, Half Over-Under, or Full Over-Under. Set the Projector to either Cinema or Cinema Curved, then select SBS or OU instead of Mono. If the video is Half SBS, set Stretch to “100” so it displays in the proper aspect ratio.
- 180 or 360 degree video: The video will usually tell you whether it’s 180 degrees or 360 degrees on the site you download it from. If it’s 180 degrees, set Projector to “Fisheye” and set FOV to 180. If it’s 360, set Projector to “Barrel” and FOV to 360. You may also have to tweak “Tilt” for 180 videos or “Rotation” for 360 videos so that the video is facing the right direction.
- Full VR video: Combine the correct settings from “3D video” and “180 or 360 degree video” sections of this list.
You can also adjust the Scale and Distance settings to fit your tastes, or click the Settings cog in the lower right-hand corner for even more options. Whirligig also has some other cool features like saving different presets, but these basics should get you up and running pretty quickly. For now, sit back and enjoy the movie! If you want to read the whole tutorial on How to Watch Any Video on HTC Vive, just click here.
Related Articles:
- Want to Output 3D Blu-ray to 3D SBS MP4 to Watch with Lakento VR Glasses
- Convert 3D MKV/FLV/YouTube/Blu-Ray To 3D MP4 For ANTVR Kit
- Convert 2D Movie Clips to 3D SBS MP4 for 3D Devices
- Teach you How to Watch 3D YouTube on Oculus Rift CV1
- View 3D Movies on Microsoft Hololens/Razer Osvr
 Pavtube New Official Site