


It is a 4K world right now. People are seeking the most wonderful audiovisual experience, whereas the 1080p resolution can not satisfy them. However, getting 4K sources is as simple as ABC, playing, editing and transcoding 4K videos could be the obstacles on your way to success. Therefore, this artilce aims to give you the best workflow to transcode, compress, edit, play your 4K videos.
To transcode, compress, edit, play your 4K videos, you need a best 4K video processing assistant. Here we highly recommend you Pavtube Video Converter Ultimate (to get Mac version). With it, you can easily preview any 4K video on this software. As we all know, 4K video can be wrapped in many video containers like XAVC, MKV, MP4, MOV, M2TS, MTS etc, and most devices like iPhone X, Android, Xbox, have limits to their supported video/audio formats. There are few devices can play all kinds of 4K videos. Therefore, when your 4K video can not be accepted by your target deivce, and you need to transcode the 4K video to your device supported formats.
In other aspect, video in 4K resolution will be very large. Can you image that one 10-minute video in 4K resolution will hog up 2.5GB hard drive space? A minute of iPhone 4K at 60fps in HEVC eats up 400MB storage space. The large file brings us a higher level vusial enjoyment, also birngs the difficulty of saving to us. With Pavtube Video Converter Ultimate, you are able to compress 4K to 1080p, and convert the 4K AVC (H.264) to 4K HEVC (H.265) for saving 50% storage and a consideration amount of bandwidth.
Apart from transcoding 4K videos, it is also designed with the easy-to-use video editing functions. If you are familiar with video format, container and codec, you can directly choose video format, then adjust the 4K video and audio bitrate, frame rate, resolution, channel and more parameters to make the outputed video more fit in your video player and multimedia devices.
Moreover, it can fulfill all the needs of making a professional video for public consumption or simple creativity trying. With it, you can merge separate 4K video clips into one, insert external subtitles to 4K video, add transparent text watermark/image watermark to 4K video, crop black bars around the video frame, split large video files into small parts, adjust video color brightness, contrast, saturation, remove audio from a video or replace audio in the 4K video, trim video footage, crop unwanted area from video, etc.
Best Workflow to Play, Edit, Transcode 4K Videos
Step 1: Add 4K videos.
Open the program, click "File" menu, from its drop-down option, select "Add Video/Audio" to load 4K video to the program. To play the 4K video, you can click the "Preview" button and watch the 4K video under the preview window, you can take snapshot from the playing window as Thumbnail or for other use. By clicking the folder button, you can find the snapshots you took.

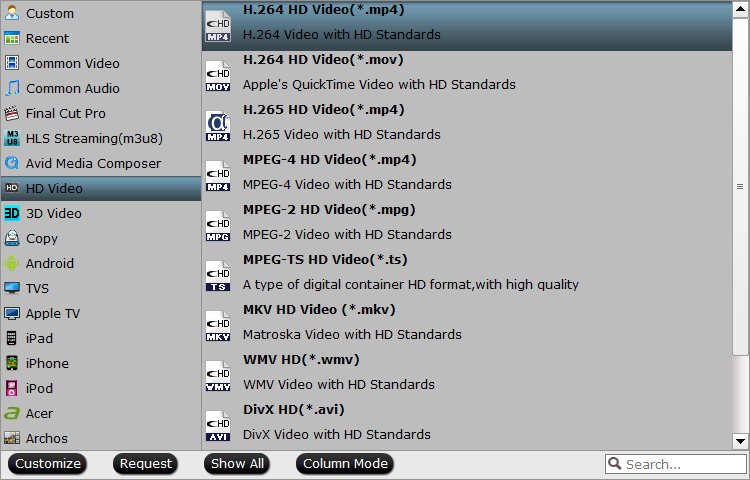
Step 2: Choose output file format.
From "Format" bar drop-down list, choose the formats that you want to output for later use. For compatibility consideration, it is idea for you to choose "Common Video" > "H.264 HD Video (*.mp4)" as output file format.
HEVC promises a 50% storage reduction as its algorithm uses efficient coding by encoding video at the lowest possible bit rate while maintaining a high image quality level. So if your device supports to decode the HEVC MP4, you can define the output format as "H.265 HD Video(*.mp4)".
You also can output optimized devices presets for iDevice, Android devices, game console, non-linear editing software, and more.

Step 3: Compress 4K video to 1080p.(Optional)
Open "Profile Settings" window, click "Size(pix)" to select 1920*1080 as the final resolution for output video. If you still want to output 4K video, you can type 3840*2160 in Size(resolution).

Step 4. Edit 4K videos
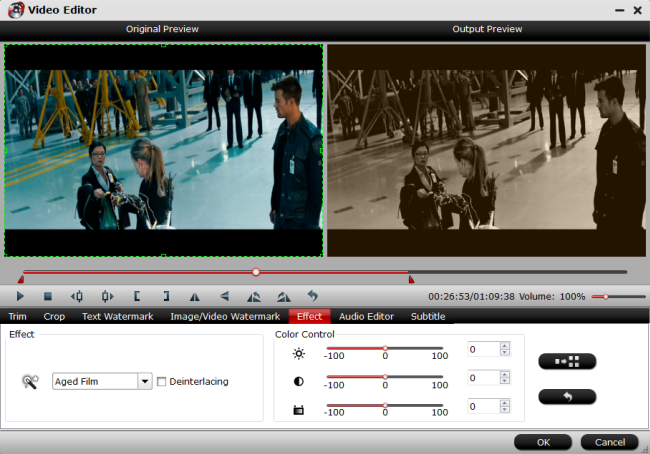
To activate the "Edit" menu, you have to select an item first. When a video file is selected, you can click the "Edit" icon  on the tool bar of main interface to edit selected file. On the "Video Editor" Window, you can play and preview the original video and output effects. Also you can flip video, trim, rotate, and reset.
Trim: The "Trim" feature allows users to decide where to start and where to end when converting the selected clip, so that unwanted segments will be cut out after conversion.
Crop: The "Crop" facility enables users to get rid of the black edges and unwanted area of the image.
Text Watermark: Check Enable, you can add text watermark to selected 4K video clip. You can either set parameters or drag the text on preview screen to set its location.
Image/Video Watermark: Check Enable, you can add images or videos as watermark onto selected video file. The location can also be set by dragging on the preview screen.
Effect: Under Effect tab, you can add special effects like Simple Gauss Blur, Flip Color, Invert, Aged Film to your source 4K video.
Audio Editor:You can either replace/remove original audio, or set audio fade in/out effects.
Subtitle: In this tab, you can add *.srt or *.ass/*.ssa subtitle-files to the video as hard subtitles.
Step 4: Start to convert 4K video
After all the settings is completed, hit right-bottom "Convert" button to start to convert 4K videos. When the conversion is over, please go to the output foler to get the converted files.
Related Articles
Any Product-related questions?support@pavtube.com