Top Free/Paid Video to Video Converter Reviews

Top Free/Paid Video to Video Converter Reviews

Camille Wesley No Comments

More and more people are getting to know video conversion cause it is often that you can’t play MKV files on your Samsung TV via USB or you usually need to convert Dji Phantom 4 footage to FCP, iMovie for editing. Thus, having a reliable video conversion tool is important for us. We have to chance to try each video converter online so we just gathered top 5 free and top 5 paid video to video converter here.

Top 5 Paid Video to Video Converter Review

1. Name: Pavtube Video Converter Ultimate

Pavtube Video Converter Ultimate is the best BD/DVD/Video solution for Windows users to backup BD/DVD, compress disc and transcode video clip (including H.265) to almost all popular video and audio formats like m3u8, H.265/HEVC MP4, MKV, M4V, AVI and play on iPad, iPhone, Android phones, Windows phones, game consoles, HD media players, and more.

Home Page: http://www.multipelife.com/video-converter-ultimate

Key features:

  • 6 times faster conversion
  • Supports more than 182 formats
  • 4K UHD Support
  • Rip Blu-ray & DVD
  • 3-Click Video Conversion
  • Edit, enhance & personalize your videos file.
  • Trim, crop, split, merge, rotate video.
  • Create 3D out of 2D/3D source

2. Name: Bigasoft Total Video Converter

Bigasoft Total Video Converter is an easy-to-use tool to fast convert between various video/audio files to help you enjoy favorite movie/MTV/music/song on portable device, mobile phone, mp4 player, personal computer and television.

Home Page: http://www.bigasoft.com/total-video-converter.html

Key Features:

  • Enjoy Your Favorite Movie Anytime, Anywhere
  • Trim Video to Watch Favorite Clips Only
  • Convert video to Android/Samsung Galaxy
  • Easy-to-Use, Only 3 Easy Steps

3. Name: Xilisoft Video Converter Ultimate

Xilisoft video converter is powerful, versatile video conversion software which converts between all popular video and audio formats. These including AVI, MPEG, WMV, DivX, MP4, H.264/MPEG-4 AVC, RM, MOV, XviD, 3GP, FLV, VOB (the video format used in DVD), DAT (the video format used in VCD, SVCD), etc.

Home Page: http://www.xilisoft.com/video-converter.html

Key Features:

  • Convert more than 160 video and audio formats
  • Convert HD videos, up to 1080p and 4K video
  • Convert 2D movies into 3D
  • Convert videos/audios to iPhone/iPad/iPod, and Galaxy devices
  • 5X Speed Promotion with GPU acceleration

4. Name: AVS video converter

AVS video converter is another great software that can convert video for various devices including iPod, iPad, Nintendo, Sony PSP, Blackberry, etc. It also has video editor to customize and add effect to the video and burn files on to DVD/Blu-ray discs to create personal videos.

Home Page: http://www.avs4you.com/AVS-Video-Converter.aspx

Key Features:

  • Convert All Key Video Formats 
  • Convert Video for Various Devices 
  • Create Personal DVD/Blu-ray Videos 
  • Manage HD-Camera Videos 

5. Name: Any Video Converter Ultimate

Any video converter ultimate is an all-in-one video converting software with easy-to-use graphical interface, fast converting speed and excellent video quality.

Home Page: http://www.any-video-converter.com/products/for_video_ultimate/

Key Features:

  • Record video & legally remove DRM protection
  • Download videos and music from YouTube and 100+ sites in batch
  • Convert DVDs & CDs & videos to 200+ formats for various devices
  • Edit video clips with cut, crop, and special effects

Top 5 Free Video to Video Converter Review

1. Name: Pavtube Video Converter

Overview: Pavtube Video Converter is an all-in-one video converter tool specially developed for users to convert videos from one format to another. By using this best video converter software, you are able to convert TiVo shows(also working as a lossless TiVo Converter or a TiVo shows converter), tanscode AVCHD MTS/MTS footage, handle Canon shootings, and many other files, including MXF, MKV, TS, TOD, MOD, FLV, F4V, AVI, QuickTime MOV, VOB, MP4, MPG, MPEG, SWF, ASF, MVI, VP6, EVO, VRO, DV, MP3, AC3, MKA, WMA, WAV, M4A, OGG, APE and more.

Home Page: http://pavtube.cn/video_converter/

2. Name: Freemake Video Converter

Overview: Freemake Video Converter converts video between 500+ formats and gadgets free! Convert to MP4, MP3, AVI, MKV, iPhone, Android. Convert YouTube to anything.

Home Page: http://www.freemake.com/free_video_converter/

3. Name: Convertilla 

Overview: Convertilla is a simple and convenient program for converting video and music files between various formats. It supports MP4, FLV, MKV, MPG, AVI, MOV, WMV, 3GP, MP3, WEBM, OPUS, AAC, FLAC, APE, WAV.

Home Page: http://convertilla.com/

4. Name: Video to Video Converter

Overview: With our video converter you can convert videos for free to AVI, MP4, MKV, MPEG, WMV DVD, 3GP, MP3, FLV, SWF, iPod, iPhone, PSP, Android, Mobile phones, Rip and Burn DVD, convert to YouTube, and much more…

Home Page: http://www.videotovideo.org/

5. Name: VSDC Free Video Converter

Overview: VSDC Free Video Converter is a fast, powerful, feature-rich and easy-to-master multiformat video converter. Its main purpose is to edit and convert video files from one format into another. All popular video formats are supported, such as AVI, WMV.

Home Page: http://www.videosoftdev.com/free-video-converter

Related Articles:

[macOS Sierra] 3 Tools to Convert Video Perfectly on Mac

Camille Wesley No Comments

Just like the OS X El Capitan update, the release of macOS Sierra 10.12 also makes some video converter dead. Even not all Macs can update to macOS Sierra, so you can image that the requirement it has for video converter would be how strict. Even so, there are still some video converters that can run perfectly on Mac OS X 10.12 macOS Sierra operating system. Let’s see which video transcoders that can transcode videos greatly on Mac OS X macOS Sierra.

Video converter on macOS Sierra

Top 3 Video Converters for OS X 10.12 macOS Sierra

No. 1 Video Converter for macOS Sierra: Pavtube iMedia Converter for Mac

Summary: Pavtube iMedia Converter for Mac is the best BD/DVD/Video solution to backup BD/DVD, compress disc and transcode video clip (including H.265) to almost all popular video and audio formats like m3u8, H.265/HEVC MP4, MKV, M4V, AVI and play on iPad Mini 4, iPhone 7, Samsung Galaxy S1, PS4, Xbox One S, HD media players, and more. In addition, Pavtube software provided you batch processing facility that allows multiple video conversions at the same. Read the top 5 reasons to choose Pavtube iMedia Converter for Mac.

Pros:

> Built in numerous video audio codecs, it is powerful enough to transcode videos among virtually all video/audio formats, including MKV, HEVC (H.265), M2TS, AVCHD, FLAC, MP3, MP4, MOV, AVI, WMV, MPEG, FLV, VOB, 3GP, etc.
> Optimized preset output profiles make it easy to transcode videos to iPhone, iPad, Apple TV, Android tablet, Samsung Galaxy S7, Google Nexus, Kindle Fire 7, PS4, Xbox, Surface Book, etc.
> Support TrueHD audio and keep 7.1/5.1 audio while ripping Blu-ray
> This video transcoding software is designed to transcode videos at any resolution, including 1080p, 2160p 4K and 4320p 8K.
> Support MXF in XAVC video codec
> Create 3D SBS MKV/MP4 out of 2D/3D source for Gear VR, Oculus Rift CV1, ZEISS VR One, etc.
> This all-in-one product has a very user-friendly interface and every option is placed in a simple way.
> Excellent Built-in Video Editor As a powerful video converting software, it provides dozens of video editing functions, including: trim video length, crop video size, split large video into segments, add watermarks, adjust video effect.

Cons:

> It is a closed-source. If you use its free trial version, your output video will have the water marker in the middle.

No. 2 Video Converter for macOS Sierra: Any Video Converter for Mac

Summary: The name truly says it all. Any Video Converter is a fantastic piece of freeware that can handle conversions to everything from DivX and MPEG4 to VOB and more than 60 other input formats, all within an attractive and minimalist interface that’s trouble-free and pleasing to navigate without being overly daunting. The software features user-defined video outputs, as well batch processing for converting multiple files simultaneously, and saves all converted video to a pre-designated folder for quick access and organization. Aside from the basic conversion features, AVC can also directly extract and convert audio from any given video into a limited number of formats such as MP3, AAC, WAVE and others. Plus, the program can download and convert YouTube and Google videos by simply pasting the specified video link into the download box and clicking a few buttons.

Pros:

> Any Video Converter for Mac Freeware is also a free audio CD ripper and video to audio converter which can rip audio tracks from CDs, extract audio tracks, sound or background music from videos.
> lets you download videos from Youtube, Facebook, Dailymotion, Vimeo, Metacafe, Howcast, Niconico and other 100+ sites.

Cons:

> The built-in DVD burner is a bit finicky
> Can’t rip and backup Blu-ray/DVD discs, DVD ISO/IFO, Video-TS folder.

No. 3 Video Converter for macOS Sierra: Aiseesoft Video Converter Ultimate for Mac

Summary:  Aiseesoft Mac Video Converter Ultimate is powerful DVD video converting software, which can convert home-made DVD and videos to MP4/AVI/WMV/3GP/MOV/FLV/ MP3/FLAC/WAV video or audio formats for playing on prevailing devices and further editing on well-know editing software. For playing on TV, it also can convert video to 3D video formats, which allows you to select 3D audio modes. Moreover, it has download function, which helps users download videos on internet can convert them to proper video formats as needed. This Mac Video Converter Ultimate can also convert 4K videos and HD videos. It’s video enhancement function can convert normal video to 1080p and higher resolution while keeping great video quality. It can also rotate video according to your need.

Pros:

>Support convert 4K video
>Add video rotate function in the newest version

Cons:

> No H.265 encoder/decoder
> No M3U8 output
> Can’t rip Blu-ray

Comparison of the Best 3 Video Converters for macOS Sierra

Video Converter Pavtube iMedia Converter for Mac Aiseesoft Video Converter Ultimate for Mac Any Video Converter for Mac
Supported Input Files
SD/HD/4K Video Yes Yes H.265 video unsupported
DVD Yes Yes Yes
Blu-ray Yes Not support 4K Blu-ray Yes
Ouptut File Formats
MP4/MKV/AVI Yes Yes Yes
3GP/MOV/WMV Yes Yes Yes
4K H.265 MP4 Yes Yes Yes
4K H.265 MKV
Yes
No
No
MP3/OGG/AC3/AAC Yes Yes Yes
iPhone/iPad Preset Yes Yes Yes
Apple TV preset Yes Yes Yes
Custom Tool
Trim/Split/Merge/Crop Yes Yes Yes
Adjust A/V parameters Yes Yes Yes
Adjust aspect ratio Yes Yes Yes
Batch Conversion Yes Yes Yes
Add subtitles to video Yes No Yes

Verdict

Especially, we want to praise Pavtube iMedia Converter for Mac for its multiple functions for Mac. This professional video converter integrates all the functions of Blu-ray Ripper + DVD Ripper + Video Converter + Audio Converter. It is also regraded as the best 4K Video Converter for macOS Sierra to compress 4K to 1080p/720p and upsale SD/HD video to 3840p/2160p video on Mac OS X 10.12 macOS Sierra, Mac OS X 10.11 El Capitan, Mac OS X 10.10 Yosemite, 10.9 Mavericks, 10.8 Mountain Lion, 10.7 Lion, 10.6 Snow Leopard, 10.5 Leopard.

Screenshot

Availability 


List of Macs Compatible with MacOS Sierra 10.12

According to Apple, the official compatible hardware list of Macs capable of running Mac OS Sierra 10.12 is as follows:

  • MacBook Pro (2010 and later)
  • MacBook Air (2010 and later)
  • Mac Mini (2010 and later)
  • Mac Pro (2010 and later)
  • MacBook (Late 2009 and later)
  • iMac (Late 2009 and later)

This list of supported Macs is offered directly from Apple, shown during the MacOS Sierra debut presentation at WWDC 2016 conference.

How to Check Your Mac for MacOS Sierra Compatibility

The simplest way to determine if your Mac is compatible with MacOS Sierra is to check the model make and model year, here is how to do that:

  1. Open the  Apple menu in the upper left corner and choose “About This Mac”
  2. From the “Overview” tab, look under the current system software version and for the computer model and year

If the Mac is the same or a later model year than what is shown in the macOS Sierra compatibility list above, the Mac is compatible with 10.12.

macOS Sierra FAQ: What You May Want to Know About the new Mac operating system

Q1: How much will macOS Sierra cost?

A1: Apple makes its operating systems available for free, and macOS Sierra will be no different.

Q2: Should you upgrade to macOS Sierra?

A2: Once you’ve determined that you have compatible hardware, deciding to upgrade is a personal choice. If you absolutely depend on a specific app and would be crippled without it, you should wait to make sure from that app developer that their software will work with macOS Sierra. If you do decide to upgrade on macOS Sierra’s ship date, make sure you back up your data first. If you end up having a serious problem, you can revert back using your backup.

Q3: What are the other new features?

A3: Here’s a list of the major new features showcased at Apple’s Worldwide Developers Conference. They include iCloud Drive Desktop access, Optimized Storage, Picture in Picture, Tabs, and Universal Clipboard.

Some of the other neat features:

  • Apple File System, a new file system not only for macOS but also for iOS, tvOS, and watchOS.
  • enhanced Messages
  • support for third-party app integration with the Contacts app
  • Apple Music improvements

Photos for Mac gets new features, too. A new Memories tab automatically creates slideshows based on events, places, or people. There’s also support for extension for Photos that will allow for editing of Live Photos. When you make an edit, it will apply to the whole Live Photo, not just the one sequence you edited.

Safari will have a major change in the way it handles content that uses plug-ins like Flash, Sliverlight, and QuickTime. You’ll see an alert that tells you the plug-in is not installed, and you’ll need to click on a “Click to use” button to see the content. Apple is doing this to force websites to load—if it’s available—HTML5-compliant media implementations.

You May Also Want a Blu-ray Ripper for macOS Sierra– Pavtube ByteCopy

– Decrypt commercial Blu-rays encoded VC-1 and AVC to digital files.

– Convert DVDs to MOV/MP4/M4V by removing copy protection.

– Rip BD/DVD to multi-track MP4/MOV with multiple subtitle/audio.

Related Articles:

Blu-ray Solution Suggestions and Recommendations from Pavtube

Camille Wesley No Comments

In this article, you can find many solutions to stream Blu-ray on TV, Laptop, Tablet, Smartphone, Media player on PC, etc. You also can get recommendations of best Blu-ray Ripping tool in the market to help you decrypt Blu-rays.

Blu-ray Ripper/Copier Software Recommendations

Top Blu-ray Ripper Comparison

Blu-ray Ripper

2016 Top 3 Blu-ray to NAS Ripper/Copier Reviews

Blu-ray to NAS

Top 5 Blu-ray to iPad Air/Pro/Mini Converter

Blu-ray to iPad

Top 4 Blu-ray to Galaxy Note/S Series Converter

Blu-ray to Samsung Galaxy converter

Blu-ray Backup Solutions

Blu-ray backup

* Backup Blu-ray to M2TS for playing on iMac

* 3 Tools to Rip Blu-ray to Hard Drive Free

* Put Your Blu-ray Movies on Home Network

* Free Softwares to Backup Blu-ray Movies

* Backup Blu-ray to USB 3.0 Flash Drive

Blu-ray Streaming Solutions

* Copy 3D Blu-ray to Galaxy S5 for ZEISS VR One

* Make an Australia Blu-ray Region-free for PS4

* Rip Blu-ray to WD Media Server for Samsung TV

* Rip Blu-ray to Kodi Playing on Sony Android TV

* Stream Blu-ray on Popcorn Hour A-500 Pro

WATCH BLu-ray movies

Blu-ray to VR Headsets

3D Blu-ray to Gear VR

3D Blu-ray to Zeiss VR One

3D Blu-ray to Oculus Rift CV1

3D BD to Oculus Rift CV1

Blu-ray to Multi-track Video

* Rip Blu-ray to mp4/mov with multi-track Audio/Subtitle

* Way to Rip Blu-ray to multi-track AVI on Windows 10

* Rip BD to mkv with optional multi-language audio/sub

* Rip Blu-ray to lossless MKV format with DTS 5.1 sound

They Are Downloading

Best Blu-ray Ripper Software – Pavtube ByteCopy

– Rip Blu-ray encoded with VC-1 and AVC to digital files.

– Decrypt Blu-ray BD+, region codes, AACS up to mkb61.

– Rip Blu-ray to lossless MKV and multi-track MP4/MOV.

– Rip Blu-ray to VLC, QuickTime, WMP, etc media players.

– Batch conversion, GPU acceleration, video editing feature.

Other Related Blu-ray Articles:

Convert AVI to Play with QuickTime

Camille Wesley No Comments

There might be some old files in AVI container in your local movie library cause AVI was very popular a long time ago. And if you want to play some non-DVD video on DVD Player, AVI is also a good choice. Facing with so many AVI video, how can you do if you want to play these AVI files with QuickTime? After all, almost every Mac user know that QuickTime only can play .mp4 .mov . m4v video.

To play AVI video in QuickTime, there are two ways:

Method 1: You can install a QuickTime AVI plugin for a smooth playback on the player. Perian is a free QuickTime component that can let you play various popular video formats (including AVI) not natively supported by QuickTime. However, it’s pity that Perian for QuickTime has no longer been maintained and updated.

Method 2: You also can convert AVI to MP4/MOV/M4V for QuickTime with some video converter.Then you can watch AVI videos on QuickTime. Actually, with video transcoder, you can play various video in QuickTime.

Best AVI to QuickTime Converter – Pavtube iMedia Converter For Mac

avi to movPavtube iMedia Converter for Mac is an all-in-one video converter that can copy Blu-ray and DVD and convert video to another format according to your needs. So with it, you never need to worry about video compatibility issue on QuickTime and other media players.


  • Convert AVI to QuickTime MOV, MP4, M4V standard/HD video formats.
  • Convert MP4, MKV, Tivo, MPEG, H.265/HEVC, VOB, etc to QuickTime.
  • Transcode Dji Phantom/Sony/Canon/GoPro AVCHD, XAVC, MTS, MXF.
  • Rip Blu-ray, DVD and ISO image to MOV/MP4/M4V for QuickTime playing.
  • Additional video editor enables you to personalize AVI videos before conversion.
  • Process AVI to MOV conversion in amazingly quick speed.
  • Fully compatible with Mac OS X El Capitan, Yosemite, Mavericks, Mountain, etc.

Read top 5 reasons to choose Pavtube iMedia Converter for Mac

How to Convert AVI to MOV for QuickTime?

Step 1: Load AVI files

After installation, just open this app to enter into its default interface. Then, in the top left hand corner of this app’s interface, click the “Files” button to import the AVI files you want from the computer. Or, directly open the folder to find your favorite AVI files, and then drag these target files to this program. This video converter supports batch conversion so you can add multiple AVI files and batch convert them to QuickTime.

load AVI files

Step 2: Choose output format

Select and custom output format. Click “Common Video” > “MOV – QuickTime (*.MOV)” to get the optimized output file for AVI to QuickTime conversion on Mac El Capitan.

Tip: You can also check the “Settings” box, and set video codec, video size, Bitrate, frame rate to get a decent video you want on your QuickTime player.

Note: The AVI to MOV Converter Mac additionally offers you some useful edit functions for making your videos more enjoyable. You can split, crop, add cool effects to your media files or capture your favorite scene of the video.

Step 3. Start to convert AVI to MOV on Mac

Hit the “Convert” button and let this smart Mac AVI to MOV Video Converter do the rest for you! This video converter was specifically designed for Mac OS users. It performs greatly on iMac, Mac Pro, MacBook, MacBook Pro, MacBook Air either with Mac OS X 10.11 El Capitan, 10.10 Yosemite, 10.9 Mavericks, 10.8 Mountain Lion, Mac OS X Lion or Mac OS X 10.6 Snow Leopard.

When the conversion is done, you can play the output MOV videos in QuickTime and you also can edit them in iMovie, Final Cut Pro, or put them on your iPad Air 3, iPad Pro, iPhone 7 for playback whenever you like. It is cool, right? Have a nice media experience then!

They Also Downloading – Pavtube ByteCopy

– Decrypt Blu-ray encoded VC-1 and AVC to QuickTime video.

– Convert DVD video to MOV/MP4/M4V by removing copy protection.

– Rip BD/DVD to multi-track MP4/MOV with multiple subtitle/audio.


Related Articles:

Teach you How to Watch 3D YouTube on Oculus Rift CV1

Camille Wesley No Comments

YouTube is always a main source to download 3D video for VR Headsets. When you have Oculus Rift CV1 in handy, you maybe also want to download some YouTube 3D video and watch with Oculus Rift CV1. So here, let’s show you how to watch 3D YouTube video on Oculus Rift CV1step-by-step.

Guide to Play Youtube 3D Videos on Your Oculus Rift CV1:

1. Install Virtual Desktop.

install virtual desktop app

2. Find a 3D Youtube video.

Copy the link from the 3D video. For example, you could paste the following link: https://www.youtube.com/watch?v=LdTm7Vpape0

To watch it in 3D, you better use Chrome as it’s the only browser that allows you to play it without problems.

3. Copy/paste the link to your Virtual Desktop.

Open up “Virtual Desktop” and go to VIDEO PLAYER tab. Paste the link in the “Paste URL” blank.

Virtual Desktop will take care of downloading the video at the highest quality possible (usually 4K when its available) and will play it back right away.

The videos are saved into your “My Videos\360 Videos” folder.

Virtual Desktop is good for watching Youtube 360 and Youtube 3603d videos. You paste the url and Virtual Desktop downloads the whole file and starts it playing full screen on the headset automatically. It is very interesting to see the Google Jump 3603d videos in it. You can see stitching flaws in Google Jump videos much more clearly than with anything else I think –eg. the violin bows in Resonance in the orchestra scenes.

Whirligig also works well with Oculus Rift CV1 and is more extensive in its support of various angular coverage fisheye (“dome”) stereo videos and equi (“barrel”) format stereo videos. But it is a hassle to use I think as it doesnt support mouse input (only keyboard and xbox controller),

Convert 3D YouTube Video to Oculus Rift CV1

You might have downloaded some 3D videos from YouTube a long time ago for your Gear VR. These 3D video maybe 3D FLV, 3D MKV, 3D MP4. But when you just test it with a 3D SBS .mkv file on Oculus Rift CV1, it does in fact work but possibly you will have is that you can’t get sound to play cause some .mkv uses DTS sound which the Oculus video app might not be able to process. If you have such 3D YouTube video, you maybe need to convert it to 3D MP4 for CV1.

Best 3D Oculus Rift CV1 Converter– Pavtube Video Converter Ultimate

– Convert 3D YouTube video to 3D SBS MP4 for Oculus Rift CV1.

– Convert 3D MTS, 3D AVCHD, 3D MKV video to 3D MP4 video.

– Rip 3D Blu-ray/3D BD ISO to 3D MKV/MP4/WMV/AVI/MOV.

– Re-encode 3D MKV DTS audio to 3D MKV AAC/AC3 audio.

– Transcode any 2D video source to 3D SBS/TAB/Anaglyph video.

Step 1. Add 3D YouTube Video

After running the program, load 3D YouTube videos to it by clicking Add button or simply drag & drops. You can add many files and convert them at one time.

Import video for Gear VR

Step 2. Choose Output Format

Click “Format” bar and find “3D Video”, there are a lot of format options for you. “MP4 Side-by-Side 3D Video (*.mp4)”  is recommended for Oculus Rift CV1.

Choose format for Gear VR

Tip: Click “Settings” which is next to “Format”, free change your target video size, bitrate, frame rate and 3D depth. If you want to get best video quality, pls switch them to “original”. 3D movies should be encoded “full side-by-side” with a 1:1 pixel aspect ratio. Content mastered at 1920×1080 compressed side­-by-­side 3D should be resampled to 1920×540 resolution full side­-by­-side resolution. Higher resolutions will not provide any better quality, meaning you’ll waste space and processing power. We also recommend using a higher bit rate than a typical web stream at that resolution, as the pixels in your video will be magnified on the phone’s screen. The optimal bit rate is content dependent, and many videos can get by with less, but 5 Mb/s should give good quality.

Step 3: Start 3D YouTube video Conversion

The last step is to press the “Convert” button to start 3D YouTube video to Oculus Rift CV1 conversion. After the conversion, click “open output folder” to quick locate the generated media file.

Read also:

Two ways to watch your converted 3D video content in Oculus Video CV1.

Method 1: You can copy your compatible video files directly to your phone or SD card* in any of the following directories:

On your phone’s internal storage (Phone): /DCIM/ /Movies/ /Oculus/Movies/

On your phone’s removable SD card* (Card): /DCIM/ /Movies/ /Oculus/Movies/

Method 2: set up an Xbox One controller with the Oculus Rift CV1

When you decide to connect your Xbox One Controller to your Windows PC you can choose to do that wirelessly or by cable. So you can have the opportunity to play games on your computer you just need to pair it with one of the two ways. This tutorial will guide you how to successfully finish the setup for your Xbox One controller with your Oculus Rift. This are the steps you will need to take to setup your Xbox One Controller :

1. How to Setup the Xbox One Controller in wireless mode

  • First connect your USB wireless adapter to any available port for USB 
  • If you have problem with your USB port use the USB extender, that is already included. This way your wireless will go smooth without interference.
  • Make the connection with the wireless adapter and the USB extender and then plug in the USB extender in the port for USB.
  • Put the AA batteries in the battery bay of the controller.
  • Press the Xbox button on the controller until you see that the lights are on.
  • On your wireless adapter you will see a sync button, press it and then hold it for a little while so you can pair the controller with the wireless adapter.
  • The light you will see on your Xbox controller shows the pairing status, this way you will know if the Xbox controller and the wireless adapter are successfully paired
  • If the light flashes slowly then the pairing is not successful
  • If the light flashes rapidly than the pairing is still in progress
  • If the light is solid than you are finished

If the region you live in has any kind of restriction for using wireless adapters, than with your Rift you will get a micro- USB cable

2. You can connect you Xbox Controller to your PC without the need of batteries by using your micro USB cable. The cable is not included in the box. If you decide to use your controller in wired mode than be aware that this way your movements in virtual reality are going to be limited. Do this following steps to setup your Xbox Controller in wired mode:

    • Put your micro USB cable into available USB port on your computer
    • Wait for couple of seconds for your computer to detect the Xbox drivers

Related Articles:

Copy DVD to Toshiba Canvio AeroMobile Wireless SSD for iPad/iPhone

Camille Wesley No Comments

It is a headache for iOS users that iPad and iPhone can’t be inserted a microSD Card to expend storage space, especially for those who love to watch movies on iPad and iPhone. Fortunately, some SSD have integrated Wi-Fi that can make you enjoy media on iOS devices wirelessly via SSD. Toshiba Canvio AeroMobile Wireless SSD is exactly ideal one SSD for iPhone and iPad streaming media via Wi-Fi. Its huge storage even can hold many DVD movies for iPhone and iPad streaming.

Play DVD on iPhone/iPAD via SSD

Toshiba’s Canvio AeroMobile portable Wi-Fi media streamer delivered 128GB of storage where its platter-based competitors offer 500GB, 1TB, or more. It’s outfitted with an SD card slot, so you can augment its internal storage, as well as play media on iPhone and iPad you’ve stored on SD cards. This huge storage allows you put plenty of DVD movies for iPhone and iPad streaming. Of course, the premise is that you have changed DVD to iPhone/iPad playable format.

As we all know, iOS devices only can read .mp4 .mov .m4v video. So if you want to play DVD on iPhone/iPad via Toshiba Canvio AeroMobile Wireless SSD, you should convert DVD to .mp4 .mov .m4v in advance.

Pavtube ByteCopy is stronly recommened here to rip DVD to iPad/iPhone readable video formats with No.1 fast ripping speed while removing all copy protection in commercial DVD discs. This means you can rip any hottest DVD to iPad Pro, iPad Air and iPad Mini, iPhone 7, iPhone 6S, etc supported video smoothly, such as DVD The martian, Revenant, The Spectre 007 and other DVD movies you like. This DVD to iPad/iPhone converter offers iPad and iPhone preset for those we don’t know how to adjust settings to get better media antertainment on iPhone/iPad via Toshiba Canvio AeroMobile Wireless SSD. It has many other functions, learn more about ByteCopy, please read ByteCopy review.

You May Also Interested: DVD to Android Converter, Blu-ray to iPad Air/Pro/Mini Converter

Free Download top Pavtube DVD Ripper for iPad/iPhone: 
  

How to Copy DVD to Toshiba Canvio AeroMobile Wireless SSD for iPad/iPhone?

Step 1: Load DVD movies 

Launch the best DVD to iPad Converter, click the “DVD disc” icon to navigate the videos. You can also add ISO file, IFO file or DVD folder. Press the selected main title you can preview the whole DVD movies on the preview window on the right, which works like a media player. 


Step 2. Choose the output format for iPad/iPhone

Click on “Format” box, a list will appear, you can easily find the “iPad” category, to enjoy DVD files on iPad with 1080p image quality, you are suggested to choose “iPad > iPad Full HD Video H.264(*.mp4)” format for output format. For iPhone streaming, you can choose format form "iPhone" category. Normally, MP4 format from "Common Video" and "HD Video" aare supported by all iPad and iPhone models.


Tip:
You can configure the output video parameters by clicking Settings. For iPad readable MP4 videos, you can just resolution, codec, frame rate, etc. For example, iPad Pro resolution is 2732 x 2048, so you can adjust video size to larger, but no larger than 2732 x 2048. 

Step 4. Start DVD to iPad/iPhone conversion 

Start the conversion by clicking on the green arrow start conversion button on the interface of this converter. After it completes, click the “Open” button on program interface to locate the created MP4 file.

Setting Up Your Toshiba Canvio AeroMobile Wireless SSD

Step 1: Charge Your Device
• Connect your device to the AC adapter and plug it into a power source.
• When connected, the battery will start blinking.
• When the light goes off, the device is fully charged and ready to use.

Step 2: Load Content
• Make sure the device is powered off before you attach it to your computer.
• To attach it, connect one end of the USB cord to your device and plug the other
end into your computer.
• Once connected, the Canvio AeroMobile Wireless SSD will be identified
as a Toshiba EXTERNAL drive (either in "My Computer" on a PC, or in "Finder"
on a Mac®).
• PC Users: Navigate to find the pictures, videos or music you want to add
to your Canvio AeroMobile Wireless SSD. Drag and drop your content to the
default user folder.
• Mac® Users: Navigate to the Mac® driver folder and install the free NTFS for Mac
driver. After installing the driver, you can now quickly drag and drop your files.

Step 3: Install the "Wireless SSD for Toshiba App" for Your iPhone®, iPad®
• Apple® device users: Download the app from the iTunes® store.
• Android™ device users: Download the app from Google Play™.
• Once inside the app store, search the applications for "Wireless SSD"
and select download.

Step 4: Turn on Your Canvio AeroMobile Wireless SSD
• Press and hold the power button for two seconds.
The green power indicator will illuminate.
• When the blue wireless light is solid, your device is ready to go.

Step 5: Connect Your Mobile Device to Your Wireless Network
• Access the wireless settings on your mobile device.
• Find and connect the network that reads TOSHIB WSSD
(followed by four numbers).
• Enter the default password: 12345678
• You should now be connected.
• Exit the settings and tap on the Wireless SSD icon.

You’re now ready to stream your DVD MP4 videos on iPhone/iPad—all wirelessly from your Canvio AeroMobile Wireless SSD.

Toshiba Canvio AeroMobile Wireles SSD Info:

Toshiba Canvio AeroMobile Wireles SSD
Capacity 128GB
Drive Type Solid-State Drive
Interface USB 3.0
802.11 b/g/n
SD Card slot
Battery Life 8 hours (video streaming)
System Requirements (PC) PC or Mac: Windows 8.1, Windows 8 and
Windows 7; Mac OS X 10.7 and 10.8 with
included NTFS driver for Mac. Available Wireless LAN interface
System Requirements (Mobile) Smart phone or tablet: iOS version 5.1 to 7;
Android version 2.3 to 4.2. Available Wireless LAN interface
Dimensions 2.5 in. x 4.8 in. x 0.49 in.
Weight 4.2 oz
Finish Light Gold

Related Articles:

3 Ways to Convert MKV to MP4 for iTunes Playing

Camille Wesley No Comments

iTunes only supports MP4 and QuickTime format video files, so many of the videos you come across on the web like MKV can’t be added directly to iTunes or transferred to an iPod, iPhone, or iPad. Luckily, this problem is easy to solve — all you have to do is convert the MKV videos to MP4 files using some tools below. Once yo have, you can add them to iTunes and use them like any other file i Tunes supports.

Best MKV to MP4 Converter Recommendation

MKV to MP4 ConverterPavtube Video Converter Ultimate is the best MKV to MP4 converter that can re-encode any codec MKV to iTunes supported H.264/MPEG-4 MP4 with excellent video quality  so that you can transfer the MP4 files from iTunes to iPhone 7, iPhone 6S (Plus), iPhone SE, iPhone 6,  iPad Pro, iPad Air 3, iPad Mini 5, iPad Mini 4, iPad Mini 3, etc.

  • Re-encode H.264, H.265/HEVC, DivX, XviD, MPEG-2, MPEG-4 MKV to H.264/MPEG-4 MP4 for iTunes.
  • Convert 2160p/1080p/720p MKV to iTunes supported MP4
    video.
  • Transcode MKV to 2160P/1080/720P/540P MP4 for iTunes streaming


Method 1: Convert MKV to MP4 for iTunes with Pavtube Video Converter Ultimate

Method 2: Convert MKV to MP4 using VLC for iTunes streaming

Method 3: Convert MKV to MP4 for iTunes with Handbrake

Method 1: Convert MKV to MP4 for iTunes with Pavtube Video Converter Ultimate

Step 1. Click “File” or the file icon right below it to follow “Load from folder” to import MKV files to Pavtube Video Converter Ultimate. Batch conversion features allows you to add multiple MKV files to convert. If your MKV files have multiple subtitle streaming, you can choose only one to preserve. Choose the subtitle and audio track in “Subtitle” and “Audio”.

You May Also Interested: Top 5 DVD to iTunes Converter for Mac and Windows

load mkv files to mkv video converter

Step 2. S Click the format bar to follow “HD Video” and “H.264 HD MP4(*.mp4).” for iTunes. You also can choose MP4 from “Common Video” category. Actually, you also can choose iPhone, iPad, Apple TV presets. These formats must be supported by iTunes.

Step 3. Click the obvious red button on the bottom-right corner to realize conversion from MKV films to MP4 which is supported by iTunes. Then a conversion window pops up to performing MKV films to iTunes conversion.

conversion from mkv films to itunes m4v

After conversion, run iTunes on your Windows computer. Click “File” to follow “Add to library” to transfer the converted MKV films stored in your Windows computer or Mac to iTunes library. And it is easy for you to sync local contents to iTunes on your computer.

Method 2: Convert MKV to MP4 using VLC for iTunes streaming

1. Open VLC player, click on the Media menu, select Convert/Save (or use Ctrl +R).

convert MKV to MP4 with VLC

2. In “Open Media” window, under File selection of File tab, click ‘Add ‘to add the Video file you want to convert to MP4 format.

After adding a video file, click “convert/save” and a window opens showing source and destination file paths.

3. Now click ‘Browse’ under ‘Destination’ and name the “Destination File” name as desired with mp4 extension and click ‘Save’

4. Opposite to Profile under Settings, choose Video-H.264+ MP3 (Mp4) format as shown in figure. Beside the chosen mp4 format, select “edit profile settings” which appears with wrench icon and, under Encapsulation tab select ‘MP4/MOV’ and save the changes.

5. Click ‘Start’ for the VLC player to begin the conversion to MP4 file, after the conversion, VLC player saves converted file in destination file path.

Using the above steps, we’ve successfully converted a MKV file to MP4, you can also do that as well.

You May Want to Learn:

AVI to VLC 4K to VLC H.265 to VLC
3D to VLC DVD to VLC Blu-ray to VLC

Method 3: Convert MKV to MP4 for iTunes with Handbrake

1. Be sure that the Handbrake has been downloaded and installed to your computer program. When that is done, you can proceed to launch it.

Read: Handbrake review | Handbrake DVD Ripping Tutorial

2. Import files- you will have to add all MKV files that you will convert to the program timeline. From the menu bar, click on “source” then “open file” among the options appearing on the dropdown menu. That will allow you to browse through the computer and locate files for importing.

Load DVD to Handbrake

3. The next step will be choosing the right output setting which is MP4. At this point, you need to give your files new names and select the folder to store them.

4. To accomplish your mission, click the “start” button and process will begin. It will take little time for that to be accomplished.

Of course, you can use almost any video converter to convert a video file to MP4 format and add it to iTunes. The above options are some of the best, but any video converter will do.

Do you prefer another video converter we didn’t cover here? Leave a comment and share your preferred tool!

Related Articles:

Best DVD to Android Converter – Copy DVD to Android Devices

Camille Wesley No Comments

Not an Android tablet or an Android phone doesn’t have a DVD Drive to play DVD movies. Even the DVD backups like DVD VOB files, DVD ISO image still can’t be played on Android devices due the incompatible format. So if you want to put some popular DVD movies such as The Martian, Spotlight, Zootopia onto your Galaxy Note 7, LG G5, HTC One M10, Galaxy J7, etc for viewing in the car trip, you have to extract Android supported video from DVD movies.

Copy DVD to Android

How to create copies of DVDs for Android devices? A DVD Ripper is simply designed for this goal. Considering the situation that DVD has unprotected and protected two kinds, the DVD ripping tool we choose can be various. For unprotected DVD discs, Handbrake seems to be the first choice since it is a free open souce. As for commercial DVDs, Pavtube ByteCopy will be the best selection to copy protected DVD to Android devices. Now, read below two methods to learn how to put unprotected and protected DVD into Android phone/tablet.

Method One: Copy Unprotected DVD to Android with Handbrake 

Handbrake is a free DVD ripping tool that can convert unprotected DVD to MP4 for Android playback. The steps are easy to operate. Read >> Handbrake Review and Alternatives 

Note: Here the tutorial is for Windows users. If you are a Mac use. Please refer to Handbrake DVD Rip Tutorial on Mac

Step 1: Open Handbrake and click on the “Source” button at the top left. Select DVD / VIDEO_TS folder from the drop down list. Select the DVD you want to rip to Android and click “OK.” 


Step 2: You may be prompted to set a default path in Handbrake. This is an optional step. Click “OK.” If you’d like to set a default destination folder, Go to Tools on the top menu, select Options. On the General tab, click “Browse” to select a destination output folder. Click “Close” when Finished. 


Step 3: Next, click the dropdown list next to “Title.” Select the title that matches the length of the movie. It’s possible you may have see more than one title with a similar length. If so, consult the DVD information, or a site like IMDB.com, to find the proper movie title length. Select your container under Output Settings. This will be your final output file extension. We will be using MP4 for this example. 


Step 4: If you didn’t set up a default destination folder, you’ll need to select one by clicking the “Browse” button. You can manually customize the output file name and change the output file extension to .mp4. 

Step 5: When you’ve finished any customizations you are ready to begin the conversion process. Click “Start.”A Command window will open and you can follow the process. You’ll probably want to find something to do in the meantime as the process could take a couple of hours. When the process completes, you’re ready to watch your MP4 video on Android. 


Method Two: Rip Protected DVD to Android with Pavtube ByteCopy 

Pavtube ByteCopy enables you to play DVD on Android with No.1 fast ripping speed while removing all copy protection in commercial DVD discs like CSS encryption, region code, Sony ARccOS, UOPs, APS, RCE, etc. This means you can rip any popular DVD movies to Samsung Galaxy phones, Galaxy Tablets, HTC, Lenovo, BlackBerry, LG, Sony smarpthone and tablets. It can convert DVD to MP4, WMV, 3GP, AVI for Android tablet and Android phones and it also offers optimized presets for Android devices. You can adjust A/V parameters such as size, bitrate to fit more in your Android device. It surprises us that ByteCopy also can convert unprotected DVD to Android like Handbrake. Read the review

The following is a step-by-step guide teaching you how to rip and convert DVD to Android with Pavtube ByteCopy. 

Free Download top Pavtube DVD Ripper for Android: 
  

Step 1: Load DVD movies 

Launch the best DVD to Android Converter, click the “DVD disc” icon to navigate the videos. You can also add ISO file, IFO file or DVD folder. Press the selected main title you can preview the whole DVD movies on the preview window on the right, which works like a media player. 


Step 2. Choose export format

You can click the dropdown menu between “Format” and “Settings”, you will see many presets sorted of different device models and programs.

Basically the “Common Video -> H.264 Video (*.mp4)” is a universal format for Android tablets and smartphones. Or depends on your device, you can choose a suitable video format from “Android” catalogue

Step 3. Adjust specs or edit video before conversion (Optional)

Click “Settings” button to configure target file quality. After entering “Profile Settings” panel, you are allowed to adjust video and audio parameters such as bit rate, frame rate, sample rate, etc..

If you think the video size this not suitable for your Android Tablet or Phone, you can first choose any one of the provided type, then change the settings. Generally speaking, the higher video bit rate will result in the larger output file size, and vice versa.

Step 4. Start conversion

Now hit the big red “Convert” to start converting purchased DVD movies to MP4 with best settings for playback on different Android -based devices. After the conversion, you can get the converted DVD rips in *.mp4 format by clicking the “Open” or “Open output folder” icon. Then transfer generated MP4 videos from PC to Android Phone/Tablet for watching.

You can use this way to transfer DVD movies to Galaxy Note 7, Galaxy S7/S7 Edge, Galaxy J7, Galaxy A9 Pro, HTC One M10, OnePlus 3, BlackBerry Priv and other popular Android tablets and Android phones. Besides Pavtube ByteCopy, there are many other DVD ripping tools that can help you decrypt DVD to Android devices. Below are top 5 DVD to Android Converter.

Top 5 DVD To Android Converter

Software Compare

Pavtube ByteCopy

ByteCopy

Pavtube DVDAid

dvdaid

imToo DVD Ripper

imtoo

Cucusoft DVD Ripper

cucusoft

Handbrake

handbrake

Supported OS: Windows 2003/XP/Vista/ 7/8/8.1/10 Windows 2003/XP/Vista/ 7/8/8.1/10 Microsoft Windows XP (SP2 or later)

Windows XP/2003/Vista/7.

Windows Vista or later

Supported Source

Unprotected DVD
Protected DVD

Output Formats

H.264 MP4

H.265 MP4

Multi-track MP4/AVI
Lossless MKV
MKV

AVI/WMV/MPEG/DivX

MOV/FLV/3GP

M3U8

4K MP4/MKV

3D MP4/MKV/MOV

MP3/AAC/AC3/FLAC
WMA/WAV/OGG/DTS
Android/Samsung/Sony/LG
HTC/Blackberry/Archos

Other Functions

Batch Conversion

Trim & Crop DVD

Merge and Split DVD

Adjust bitrate, size, channel
Select Subtitle
GPU Acceleration
Extract subtitle

Add srt.ass.ssa subtitle

Verdict:

Although you have these many choice to copy DVD to Android devices. But obviously Pavtube ByteCopy is the best performer due to multiple funtions and DVD decryption power. Besides DVD to Android conversion, it is also the best assistant to copy DVD to iPad, backup DVD to TV, convert DVD to Media Players, etc.

Related Articles:

Does Plex support H.265/HEVC Video?

Camille Wesley No Comments

More and more people are getting to know H.265/HEVC video. The H.265 video quality is fantastic and comparing with H.264 video, 50% bit rate savings verified. But many people rely on Plex to stream video. So they worry that Plex can’t transcode H.265/HEVC video and there are indeed many H.265/HEVC video playback issues on Plex:

"When I try and play a video that is h.265 on Plex seems to be a .05 second pause every half a second or so. My computer is connected with ethernet and the cpu is more powerful than the one that is in my server that transcodes it fine. So not sure what the problem is."

"Is there any Synology NAS that supports proper h.265 playback (atleast 1080p) through Plex? I’ve seen DS216j has h.265 hardware but Plex doesn’t seem to support it(?)."

"I’m wondering how HEVC is working on plex currently, particularly is streamed through a roku 3. I’m considering making future movie backups in HEVC, but don’t want to begin until plex support is 100%."

Actually, H.265 support depends on the client you are using and not the Plex server. For example, if your TV has h.265 support, then in most cases you will be able to Direct Play H.265. It is verified that when streaming H.265/HEVC video to Roku Stick, Vizio App and a GoogleTV, Plex does transcode every time right now, however the hardware doesn’t support it, and it does make your PC work harder during the transcode. That’s why many people get video choppy when streaming HEVC video on Plex. To directly play H.265/HEVC video on Plex on Roku/TV without any hassle and fast, the best way is to transcode H.265 video to H.264 video with some third-party tool.

Pavtube Video Converter Ultimate is the highly recommended for transcoding H.265/HEVC video source for Plex. It is one of the firsts to provide an H.265 encoder/decoder for Windows and it ranks top on the H.265 converter application list. With it, you can convert H.265 to H.264 MP4, MOV, WMV, AVI, MPG, FLV, M4V as Plex supported formats as with several mouse clicks as well as create H.265 video from non-H.265 videos

This video converter also can offer you these solutions: MKV to PlexBlu-ray to PlexDVD to Plex, AVI to Plex, ISO to Plex, etc.

Free download and install
    

100% clean, no adware, no spyware, registration for life long, free upgrades after sale, e-mail any question when converting videos to support@pavtube.com.

How to Convert H.265 to play in Plex?

Step 1. Add H.265 videos

Run H.265 Converter program, go to the menu bar, select “File” button to select the H.265 files you want to import. You can also directly drag the video files to the program for conversion. It supports batch conversion so you can import multiple files at a time.

Step 2. Choose output format for Plex

Click on “Format” bar, select any format you need from the drop-down profile list. You can choose regular video formats like MP4, MOV, AVI, MKV, etc. from Common Video. Or choose format from “HD Video” to get 1080p output. It suitable for Plex. If you would like to enjoy movies from Plex to your mobile phone and tablet like iPad, you can select a decent format like “iPad > iPad HD Video(*.mp4)” from the profile list comes with the software. Learn Plex Supported format

Tip:

1. Before conversion, you can go to the “Settings” to set the parameters for your movie. To compress the file size, adjust the parameters to be smaller. Learn best settings for Plex.

2. Click Edit button and you can trim, crop or adjust the video with the built-in video editor to get the very part and effect of yoru original H.265 video as you want.

Step 3: Start H.265 Video conversion

When everything is done, click Convert icon to start transcoding H.265 files.

Once you’ve liberated your movie library on Plex, you’ll make it available for viewing on Roku and  HDTV freely anytime. Read >> Plex Alternatives and Similar Media Server

H.265 vs H.264: Differences between H.265 and H.264

In general, H.265 has several big advantages over H.264, including better compression, delicate image and bandwidth saving. For more detailed differences, please read H.265 vs H.264 comparison table.

  H.265/HEVC H.264/AVC
Names MPEG-H, HEVC, Part 2 MPEG 4 Part 10, AVC
Approved date 2013 2003
Progression Successor to H.264/AVC Successor to MPEG-2 Part
Key improvement * 40-50% bit rate reduction compared with H.264 at the same visual quality
* It is likely to implement Ultra HD, 2K, 4K for Broadcast and Online (OTT)
* 40-50% bit rate reduction compared with MPEG-2 Part
* Available to deliver HD sources for Broadcast and Online
Support up to 8K Yes No. Support up to 4K.
Support up to 300 fps Yes No. support up to 59.94 fps only.

Related Software:

ByteCopy for Windows <review>– It can rip Blu-ray/DVD to lossless MKV keeping multi-track subtile/audio and all chapter markers for Plex Server.

BDMagic for Windows <review>– The best Blu-ray solution to rip and backup any commercial and region-locked Blu-ray to Plex Server.

DVDAid for Windows <review>– Capacity of ripping copy-protected DVD to Plex Media Server for playback with suitable format.

Related Articles:

Rip and Put a DVD to iPad Pro/Air/Mini for Watching

Camille Wesley No Comments

You can import your favorite DVD movies to iPad, a iPad Pro, a iPad Air or a iPad Mini for playing. Putting a DVD movie on a iPad enables you watch loved DVD movies in the countryside when you don’t have a DVD player and view DVD movies on iPad on a car trip, in a camping, etc. 

Loading DVD to iPad, you need to extract iPad supported digital files like MP4, MOV from DVD discs. DVD has two kinds of unprotected one and commercial protected one and the DVD Ripping tool you can choose will be different. Here, we are going deep into two ways to copy protected and unprotected DVD to iPad Pro, iPad Air, iPad Mini separately with different DVD Rippers. 

Before the tutorial, you need to learn >> iPad Supported Formats | DVD Ripper Comparison 

Part One: Copy Unprotected DVD to iPad with Handbrake 

Handbrake is a free DVD ripping tool that can convert unprotected DVD to MP4 for iPad playback. The steps are easy to operate. Read >> Handbrake Review and Alternatives 

Note: Here the tutorial is for Windows users. If you are a Mac use. Please refer to Handbrake DVD Rip Tutorial on Mac

Step 1: Open Handbrake and click on the “Source” button at the top left. Select DVD / VIDEO_TS folder from the drop down list. Select the DVD you want to rip to iPad and click “OK.” 


Step 2: You may be prompted to set a default path in Handbrake. This is an optional step. Click “OK.” If you’d like to set a default destination folder, Go to Tools on the top menu, select Options. On the General tab, click “Browse” to select a destination output folder. Click “Close” when Finished. 


Step 3: Next, click the dropdown list next to “Title.” Select the title that matches the length of the movie. It’s possible you may have see more than one title with a similar length. If so, consult the DVD information, or a site like IMDB.com, to find the proper movie title length. Select your container under Output Settings. This will be your final output file extension. We will be using MP4 for this example. 


Step 4: If you didn’t set up a default destination folder, you’ll need to select one by clicking the “Browse” button. You can manually customize the output file name and change the output file extension to .mp4 (Unless you prefer the iPod friendly .m4v extension). 

Step 5: When you’ve finished any customizations you are ready to begin the conversion process. Click “Start.”A Command window will open and you can follow the process. You’ll probably want to find something to do in the meantime as the process could take a couple of hours. When the process completes, you’re ready to watch your MP4 video on iPad


Part Two: Rip Protected DVD to iPad with Pavtube ByteCopy 

Pavtube ByteCopy enables you to play DVD on iPad with No.1 fast ripping speed while removing all copy protection in commercial DVD discs. This means you can rip any hottest DVD to iPad Pro, iPad Air and iPad Mini smoothly, such as DVD The martian, Revenant, The Spectre 007 and other DVD movies you like. Most importe, this program constantly upgrade to support the newest devices like iPad Air 2/Air 3, iPad Mini 4/Mini with Retina display, iPod touch, Apple TV 4, Apple TV 3/2/1, etc without any other program assistance. The surprise us that ByteCopy also can convert unprotected DVD to iPad like Handbrake. Read the review


The following is a step-by-step guide teaching you how to rip and convert DVD to iPad with Pavtube ByteCopy. 

Free Download top Pavtube DVD Ripper for iPad: 
  

Step 1: Load DVD movies 

Launch the best DVD to iPad Converter, click the “DVD disc” icon to navigate the videos. You can also add ISO file, IFO file or DVD folder. Press the selected main title you can preview the whole DVD movies on the preview window on the right, which works like a media player. 


Step 2. Choose the output format for iPad 

Click on “Format” box, a list will appear, you can easily find the “iPad” category, to enjoy DVD files on iPad with 1080p image quality, you are suggested to choose “iPad > iPad Full HD Video H.264(*.mp4)” format for output format. 


Step 3. Optimize output profile parameters 

You can configure the output video parameters by clicking Settings. For iPad readable MP4 videos, you can just resolution, codec, frame rate, etc. For example, iPad Pro resolution is 2732 x 2048, so you can adjust video size to larger, but no larger than 2732 x 2048. 

Step 4. Start DVD to iPad conversion 

Start the conversion by clicking on the green arrow start conversion button on the interface of this converter. After it completes, click the “Open” button on program interface to locate the created MP4 file, and transfer the converted files to iPad with iTunes. 

This way can be used to import DVD to iPad Pro 12.9/9.7, iPad Air 3, iPad Air 2, iPad Air, iPad Mini 4, iPad Mini 3, iPad Mini 3, iPad Mini. A warm tip is that normally an iPad only has 32GB, 64GB, 128GB storage. If you want to transfer more DVD to an iPad, you can use an iPad-compatible External Hard Drive such as Toshiba Canvio AeroMobile Wireless SSD, LaCie Fuel 1TB Wireless, iPocket Drive, Leef iAccess iOS Micro SD, etc. 

Related Articles: 

MP4 Can’t be Played on iPads, Why?

Camille Wesley No Comments

Probably, people think that only DVD, Blu-ray, Blu-ray ISO, MKV can’t be played on iPads. You never thought that your MP4 files can’t be moved or played on iPad one day. But it indeed happened:

“I created a movie using Adobe Lightroom 3. It creates an MP4 video file. It plays in iTunes and all my other video players. However, when I try to synch to my iPad I am told that the file was not copied to my iPad because the file will not play on it.”

“Moved some local MP4 files to my iPad Pro but they cound’t be played. Strange.”

To make the issue clear, you should know which MP4 files are supported by iPad (including iPad Pro, iPad Air 3, iPad Air 2, iPad Mini 4, iPad Mini 3, etc):

iPads supports MP4 encoded with H.264/MPEG-4 with AAC-LC audio while MP4 video can be encoded with H.263, H.264/AVC, H.265/HEVC, XviD, MPEG-4, etc. So H.265 MP4, Xvid MP4 and other MP4 with iPads unsupported codec won’t be played on iPads. Even H.264/MPEG-4 MP4 with non-AAC audio can’t be streamed well on iPad. You maybe only have video but no sound or video and audio out of sync issue. When you can’t move MP4s to iPads or you can’t play MP4 on iPads but the MP4 files can be played on iTunes well, you can try the tips below:

1. You might want to try some simple stuff like restarting such.

2. To create an iPad version — go to File –> Create New Version –> Create iPad version.

3. Just Use VLC and drag’n Drop any kind of video files. >> See other iPad Video Players.

From time to time, your MP4 videos from HD torrent site or 4K source will be encoded with new H.265/HEVC codec or some old MP4 is XviD codec, the tips above seems to be useless. In this case, the following way will be the last try. It must be effective unless your iPad is broken. That is to re-encode any MP4 files to H.264/MPEG-4 MP4 with AAC audio using MP4 Video Converter for any iPad models: iPad Pro, iPad Air 3, iPad Air 2, iPad Air, iPad Mini 4, iPad Mini 3, iPad Mini 2, iPad Mini 1, iPad 4/3/2/1, etc. If you have “MP4 Can’t be Played on iPhone/Apple TV” issue, this way is also useful. Now lets’ start the solution.

Convert MP4 to iPads for Playing without any Hassle

Step 1: Download and install Pavtube Video Converter Ultimate


Features of Pavtube Video Converter Ultimate

  • Ren-encode any H.263, H.264/AVC, H.265/HEVC, XviD, MPEG-4 MP4 to H.264/MPEG-4 MP4 for iPads
  • Convert MP4, MKV, AVI, WMV, ISO, etc to iPad playable MP4, MOV, M4V.
  • Convert SD/HD/4K video to iPad optimized preset.
  • Allows you adjust video size, codec, bitrate, frame rate and audio codec, channel.
  • Add external srt/ass/ssa subtitle to video.

Mac users, please download Pavtube iMedia Converter for Mac. Learn >> top 5 reasons to choose Pavtube iMedia Converter for Mac.

Step 2. Load MP4 files

Run the MP4 to iPad Converter for iPad. Click “File” to load one or multiple .mp4 file(s) into the program. Batch conversion is supported so that you can add multiple files for conversion at a time.

MP4 to iPad Conversion

Step 3. Set video format for iPad

Set output video file format for your device. Here you can go to Format > iPad and then select your iPad model like “iPad > iPad Air HD Video (*.mp4)”. If there is no your iPad models, you can click format bar and choose common video format mp4 supported by any iPad model.

Tip:

a. If the preset video/audio parameters can’t meet your needs, just click Settings icon to adjust the video bitrate, codec, frame rate, audio sample rate, audio channel, etc.

b. If you wanna keep your original subtitle or add new, you can click on “Edit” button, the video editor will pop up. Tap “Subtitle” option and check the “Enable” icon. Then, by clicking on “Browse” to add *.srt, *.ass, *.ssa subtitle file you’ve downloaded.

Step 4. Start the MP4 files conversion

You can hit the big red “Convert” to start converting MP4 files to MP4 with best video settings for iPad.

After the conversion, click “Open output folder” in the conversion window, then transfer them to iPad, then you will be able to play MP4 files on iPad Air, iPad Pro and iPad Mini.

Related Software:

Pavtube ByteCopy for Windows/Mac – It can rip Blu-ray and DVD to iPad Pro, iPad Air, iPad Mini, iPhone, Apple TV playable MP4, MOV and M4V with original video quality.

Related Articles:

Plex Alternatives and Similar Media Server

Camille Wesley No Comments

Plex can make you stream your massive TV/movie collection from computer to elsewhere. It is easy and simple enough for some people who are not proficient in complicated things. But the mobile apps aren’t free. You have to pay if you want to stream from your PC to your mobile device. So you maybe need a free Plex-like media server app or even a complicated way of being able to stream your video collection to remote devices over the WAN.

Plex Media Server Alternatives

Here we gathered some alternatives to Plex to help you enjoy media conveniently.

You maybe also interested in the solutions: MKV to Plex, Blu-ray to Plex, DVD to Plex, AVI to Plex, ISO to Plex, etc.

Top 5 Plex Alternatives and Similar Media Server

#1: Emby

Emby, formerly Media Browser, is a media aggregator plugin for Media Center that takes your recorded, digital, or ripped media and presents it in a simple, easy to use interface. Emby prides itself on delivering a fast, intuitive, media rich experience for the whole family.

Read: Backup Blu-ray Collection to Emby Media Server

#2: Universal Media Server

Universal Media Server is a media server capable of serving videos, audio and images to any DLNA-capable device. It supports any device capable of DLNA and runs on all major operating systems: Windows, OS X and Linux. It streams to many devices including PS3, Xbox One and 360, many TVs (Samsung, Panasonic, Sony, Vizio, LG, Philips, Sharp), smart phones (iPhone, Android, etc.), Blu-ray players, and more.

Learn >> Stream BD 3D Backup/ISO via Universal Media Server

#3: PS3 Media Server

PS3 Media Server is a DLNA compliant Upnp Media Server for the PS3, written in Java, with the purpose of streaming or transcoding any kind of media files, with minimum configuration. It is backed up with the Mplayer or FFmpeg packages.

It features no codec packs to install, no folder configuration and pre-parsing or this kind of annoying thing, all your folders are directly browsed by the PS3, there is an automatic refresh, and real-time video transcoding via MEncoder.

#4: Serviio

Serviio is a free media server. It allows you to stream your media files (music, video or images) to renderer devices (e.g. a TV set, Bluray player, games console or mobile phone) on your connected home network. Serviio works with many devices from your connected home (TV, Playstation 3, XBox 360, smart phones, tablets, etc.). It supports profiles for particular devices so that it can be tuned to maximise the device’s potential and/or minimize lack of media format playback support (via transcoding).

#5: KooRaRoo

KooRaRoo Media Server allows you to enjoy your movies, music and photos on a wide range of devices in your home, including modern TVs, Blu-Ray players (BDPs), games consoles (PS3 and XBox360), mobile tablets, smart phones and dedicated media players that support DLNA.

Comparison of Some Media Server

Universal Media Server PS3 Media Server Serviio KooRaRoo Plex
Web interface
A web interface so it supports even devices without DLNA support
Yes No Partial1 Yes Yes
Automatic bitrate adjustment
Automatically changes video bitrate based on your network speed
Yes No Yes No ?
Automatic maximum quality
100% video and audio quality is maintained when possible by muxing – not transcoding – compatible files.
Yes No Yes Yes ?
Instant browsing
View your files without having to wait for the folders to be scanned, which can take minutes or hours with large libraries.
Yes Yes No No No
Subtitles on all devices
When your device does not support the subtitle format in the video, we add it to the video stream to allow you to view them anyway.
Yes Yes Yes No No
DTS support
Pass along full quality DTS instead of downmixing it to another format.
Yes Yes Yes No No
Live subtitles from OpenSubtitles
If you don’t have the subtitles for your file, UMS will download and add them for you via options on your device.
Yes No No No No
H.264 transcoding
H.264 transcoding achieves the same quality as the traditional codec MPEG-2 with much lower filesize, making it a good option for wireless networks.
Yes No Yes Yes Yes
Free
UMS is and will always be free.
Yes Yes Partial2 No Partial2
True Motion (frame interpolation)
This takes regular framerates, usually 24fps or 25fps, and adds frames in between to make the motion smoother and more realistic.
This is done using InterFrame, which is an AviSynth plugin that uses SVP libraries.
Yes No No No No
Overscan compensation
If your TV has overscan – which means it cuts off the edges of videos – we can compensate so you see the whole video.
Many people watch with overscan and never realize what they are missing.
Yes Partial 3 No No No
Automatic plugin download/install
Download and install plugins automatically.
Yes No No No Yes
Unlimited folders on PS3 & Xbox
PS3 and Xbox 360 can only display a limited number of folders, but we work around that.
Yes No No No Yes
AviSynth support
AviSynth is a powerful and flexible video and audio serving program.
Yes Partial4 No No No
iTunes support
Browse your iTunes library by playlist, artist, album and genre.
Yes Yes ? ? Yes
Renderer search support
We support renderers with search capability.
Yes No ? ? ?
Maximum network bandwidth setting
This allows you to set the speed of your network to ensure smooth playing.
Yes Partial5 No No No
DVD support
We support playing DVDs whether they are in your DVD drive or on your hard drive.
Yes Yes No Yes No
Archive support
Support for browsing archives like ZIP, RAR, GZ, etc.
Yes Partial No ? ?
3D SBS video support
Most if not all renderers do not support receiving full 3D SBS video over a network, but we work around that.
Yes Partial No ? Yes
High-quality video thumbnails
Display the maximum quality and resolution thumbnails that your device can take.
Yes Yes Yes No Yes

1 Available as a paid plugin
2 Free and paid editions exist
3 No subtitle position correction
4 No multithreading support
5 Not as accurate as the UMS one

Related Software:

ByteCopy for Windows/Mac– It can rip Blu-ray/DVD to lossless MKV keeping multi-track subtile/audio and all chapter markers for Media Server.

BDMagic for Windows/Mac– The best Blu-ray solution to rip and backup any commercial and region-locked Blu-ray to Media Server.

DVDAid for Windows/Mac– Capacity of ripping copy-protected and homemade DVD to Media Server for playback with suitable format.

Pavtube Video Converter Ultimate for Windows/Mac– Function of converting Blu-ray/DVD, 4K/SD/HD video in any format to play on Media Server.

Pavtube ChewTunes– Record, convert both DRM-ed and non-DRM video and music to all popular video/audio formats in order to ensure free playback on Media Server for better viewing experience.

More Money-saving Tips:

ByteCopy($42) + Video Converter Ultimate($65)= Only $79.9, Save $27.1
Video Converter Ultimate($65) + ChewTune($29)= Only $74.9, Save $19.1
BDMagic($49) + ChewTune($29)= Only $49.9, Save $28.1

Related Articles:

Handbrake 1.0.0 DVD Rip Tutorial on Mac

Camille Wesley No Comments

Coping DVD to Hard Drive on Mac allows you to play DVD movies with QuickTime freely without inserting DVD to DVD Drive again and again. The favorite tool I like using to rip DVD is a open-source called Handbrake. Handbrake for Mac can convert DVD to MP4/MKV for you to stream DVD movies without DVD Drive.

Backing up DVD with Handbrake is easy on Mac. You only need to load DVD movies and choose the container you want then click “Start” to begin the process. You can follow the steps below to start DVD ripping process on Mac.


Steps to Rip DVD with Handbrake 1.0.0 on Mac

Step 1: Download and install Handbrake:

https://handbrake.fr/mirror/HandBrake-0.10.5-MacOSX.6_GUI_x86_64.dmg

Step 2: Load DVD movies

With HandBrake running, insert a DVD and HandBrake will begin to analyze it. HandBrake will divide up the DVD by logical groups called Titles, each representing a different block of content on the DVD. The one that’s feature-length is usually the movie you’re trying to rip. If you are ripping a TV Series DVD to Episodes, you can uncheck the feature-length movie and then group titles with 20-40 mins to rip in sequence using the Add to Queue button.

Load DVD to Handbrake

Step 3: Choose format to output

You can choose MKV or MP4 container to output from “Contain” button. Older Handbrake for Mac version shows “Format” button.

Step 4: Start to rip DVD on Mac

Once you’ve got it set up the way you want, click the Start button on the toolbar. HandBrake will then begin to rip DVD disc. Once it’s done it’ll pop up an alert.

The speed of decoding will vary directly on the speed and capability of your Mac. Macs with more cores can decode and rip content from DVDs faster.


libdvdcss

If you rip protected DVD with Handbrake on Mac, when you load DVD to Handbrake for Mac, you will get the alarm:

Don’t panic. That just because Handbrake can’t rip protected commercial DVD. And if you try to rip them using HandBrake the first time, you’ll get an error message like this which will give you the option of installinglibdvdcss.pkg. Just download it then you can decrypt commercial DVDs with Handbrake for Mac.

Handbrake for Mac Alternative to rip protected DVD Directly

El Capitan apparently broke Handbrake ripping copy-protected DVDs. It appears that El Capitan’s new security system, “System Integrity Protection”, removes libdvdcss. If you can’t rip DVD with Handbrake on Mac El Capitan, you can disable SIP, simply reinstall libdvdcss and you’re good to go. Or you can use the Handbrake for Mac Alternative – Pavtube ByteCopy for Mac to rip DVD including commercial DVDs on Mac El Capitan. This DVD Ripper can remove DVD encryption including CSS, region code, RCE, Sony ArccOS, UOPs, Disney x-project DRM, etc then convert DVD to lossless MKV, multi-track MP4/MOV/AVI. It also can rip Blu-ray like MakeMKV.


How to rip DVD with Handbrake 1.0.0 Alternative?

Step 1: Run DVD ripping tool and click “File” to load the DVD discs. Blu-ray disc, Blu-ray ISO, DVD discs, DVD folders, DVD IFO/ISO are all supported.

Tips:
1.You can add more than one DVD movies at a time for its batch conversion function.

2. You can choose desired subtitle and audio track and forced subtitle below the chapter list.

ADD DVD MOVIES

Step 2: Click “Format”, you can choose the desired format in “Common Video” or “HD Video” profiles. On the other hand, you can choose the optimized preset for mainstreaming multimedia players, like PS3/PS4,TVHD Media Player, etc. If your devices support MKV format, you also can choose lossless MKV format.

lossless MKV

Step 3: Click big red “Convert” on the UI to begin copying DVD to MKV on Mac El Capitan. Locate the generated video in output folder.

With Handbrake alternative, you don’t need to install other tool but can rip protected commercial DVD directly. And if you purchase ByteCopy for Mac in this Summer Holiday, you can get 20% off discount. For Windows users, please turn to Pavtube ByteCopy for Windows. The Summer Vacation Promo for ByteCopy for Windows is that you buy ByteCopy, you can get a free Video Converter. The video converter you can get free listed here.

Related Articles:

Rip Blu-ray with MakeMKV Directly

Camille Wesley No Comments

Blu-rays give people the super HD movies but the disc limits the playback on Blu-ray Player. To play Blu-ray movies, you have to use Blu-ray Player or your device has to own an internal Blu-ray Drive. Fortunately, you can rip Blu-ray to MKV with MakeMKV to liberate the mian movie from Blu-ray discs. Then you can use VLC to play the Blu-ray MKV rips on PC without using Blu-ray player and Blu-ray discs. So do you know how to decrypt Blu-ray with MakeMKV? It is easy to operate with just 3 clicks. Now, you can follow the steps below to start Blu-ray ripping with MakeMKV.

Steps to Rip Blu-ray with MakeMKV

Step 1:  Download and install MakeMKV. Note: MakeMKV is completely free during the beta-testing phase, but that may change when the final release is available, so get the software while you can.

Step 2: Insert Blu-ray discs to your PC’s Blu-ray drive or external Blu-ray drive. Then click “File” in the interface of MakeMKV to start to load Blu-ray movies. MakeMKV will scan the Blu-ray movies automatically to identify the titles to rip.

put Blu-ray to MakeMKV

Step 3: You can uncheck the title you don’t want to rip. And then select the location for your movie in the Output Folder menu box. Finally, click Make MKV button to start to rip Blu-rays. Wait for at least 30 minutes then you can get Blu-ray MKV rips on Hard Drive.

rip blu-ray with Makemkv

How to Play Blu-ray MKV Files?

You can get Blu-ray MKV rips within several clicks with MakeMKV. But MKV is not a friendly format in that it can contain multiple video and audio codec. You can’t play MKV files freely cause many devices and media players can’t play certain MKV file. Especially, when your Blu-ray is encoded with VC-1, even the Kodi, Roku 4 and OHC can’t play VC-1 MKV rips. To play H.264/AVC Blu-ray MKV, you can use some MKV Players like DIVX 10,  VLC Media Player and 5KPlayer.

However, if your MKV comes from VC-1 Blu-ray, you may need to use Pavtube Video Converter Ultimate <Mac version> to transcode VC-1 MKV to H.264 MKV, MP4, WMV, 3GP, MOV, etc for playing on WMP, iPhone, iPad, Galaxy S7, etc.

Since MakeMKV only can output MKV file, here I can recommend an alternative to MakeMKV for Windows and MakeMKV for Mac.

Pavtube ByteCopy for Windows/Pavtube ByteCopy for Mac are regarded as the best alternative to MakeMKV for Windows and for Mac seperately. This Blu-ray Ripper can rip VC-1 and AVC Blu-ray to lossless MKV as MakeMKV. It also can convert Blu-ray to multi-track MP4, MOV, AVI that MakeMKV can’t do. Some main features are listed below and more functions are in the review.

  • Best DVD/Blu-ray to multi-track MKV, MP4, MOV, Apple ProRes MOV solution.
  • Capability of extracting SRT, ASS, SSA subtitles from Blu-ray/DVD movies.
  • Support to encode H.265/HEVC codec from the latest DVD/Blu-ray disc.
  • Powerful video editing feature: trimming footage, cropping black area and adding watermarks.
  • It does work for DVD/Blu-ray: rip, backup, convert and edit DVD/Blu-ray movies to other video formats, like M3U8, H.265, 3D MP4lossless MKV.


Related Articles:

Handbrake 1.0.0 Reviews and Top 4 Alternatives to Handbrake

Camille Wesley No Comments

Handbrake 1.0.0 is the cross-platform, easy-to-use video ripping and encoding tool, took the top spot by a wide margin, with close to 70% of the overall vote. The highlight is that this video transcoding and DVD ripping tool is availability on multiple platforms, its ease of use and presets for quick conversions and its speed.

How to Use Handbrake 1.0.0 to Convert Video/DVD?

Step 1: Open Handbrake and click on the “Source” button at the top left to load your DVD and video files. Select the folder, and click “OK.”

Step 2: You may be prompted to set a default path in Handbrake. This is an optional step. Click “OK.”

If you’d like to set a default destination folder, Go to Tools on the top menu, select Options. On the General tab, click “Browse” to select a destination output folder. Click “Close” when Finished.

Step 3: Next, click the dropdown list next to “Title.” Select the title that matches the length of the movie. It’s possible you may have see more than one title with a similar length. If so, consult the DVD information, or a site like IMDB.com, to find the proper movie title length. Select your container under Output Settings. This will be your final output file extension. We will be using MP4 for this example. You also have the option of MKV.

Step 4: If you didn’t set up a default destination folder, you’ll need to select one by clicking the “Browse” button. You can manually customize the output file name and change the output file extension to .mp4 (Unless you prefer the iPod friendly .m4v extension).

Settings

There are a variety of custom settings that can be changed either through the tabs listed under Output Settings, or by selecting one of the Presets to the right.
If converting exclusively for any of the devices listed in the preset list, simply click on that device and the settings will be automatically applied in the Output Settings tabs. For more Universal (non-Apple) devices or output, select the Normal profile.

The Video tab allows you to choose your codec. H.264 is the default. You also have the option to choose a target (output) size. The Constant Quality is recommended to be set between 59% – 63%. Anything over 70% will likely result in an output file larger than the input without any improved quality.

Step 5: When you’ve finished any customizations you are ready to begin the conversion process. Click “Start.”A Command window will open and you can follow the process. You’ll probably want to find something to do in the meantime as the process could take a couple of hours. When the process completes, you’re ready to watch your video.

Handbrake can convert video and DVD to MP4/MKV but it can’t output other format like MOV/M4V for iTunes use. It also can’t rip protected DVDs and Blu-rays. And some upgrade on Windows and Mac OS X 10.12 macOS Sierra also can lead Handbrake off-work. So sometimes, we need Handbrake alternative to help you convert video to MOV, M4V, WMV, etc or copy commercial DVD and rip Blu-rays.

BDMagicByteCopyDVDAidVideo Converter Ultimate are top 4 Handbrake alternatives that can alter Handbrake to convert video, copy DVD and rip Blu-rays. Below is their main features.

Top 4 Alternatives to Handbrake 1.0.0

Handbrake Alternative DVDAid ByteCopy BDMagic Video Converter Ultimate
Conversion objects
Blu-ray sources

Y

Y

Y

DVD sources

Y

Y

Y

Y

Audio/video files

Y

Main features
Directly (main movie) copy

Y

Y

Y

Y

Full disc copy

Y

Y

Y

Y

2D/3D-3D

Y

Y

Y

Y

Batch conversion

Y

Y

Y

Y

Merging in one file

Y

Y

Y

Y

GPU acceleration

Y

Y

Y

Y

Multi-track output

Y

SRT subtitle export

Y

Video preview

Y

Y

Y

Y

Built-in video editor

Y

Y

Y

Y

Snapshot

Y

Y

Y

Y

Output audio format
MP3, M4A, AAC, FLAC, M4R, MKA, OGG, WAV, etc.

Y

Y

Y

Y

Output video format
AVI, WMV, MP4, MKV, MOV, M4V, VOB, DV, ASF, MPG, 3GP, 3G2, etc.

Y

Y

Y

Y

Supported OS
Windows XP/2003/Vista/Windows 7/Windows 8/Windows 8.1/Windows 10

Y

Y

Y

Y

Supported devices
Apple devices

Y

Y

Y

Y

Android devices

Y

Y

Y

Y

Windows devices

Y

Y

Y

Y

Game consoles

Y

Y

Y

Y

Media players

Y

Y

Y

Y

Other popular devices

Y

Y

Y

Y

Overview of Top 4 Handbrake Alternatives

Pavtube ByteCopy is a Blu-ray Ripper + DVD Ripper that can alter Handbrake to convert Blu-rays and DVDs and edit Blu-ray/DVD:

  • Rip Blu-ray encoded with VC-1 and AVC
  • Decrypt Blu-ray AACS, BD+, UOP up to MKB61.
  • Convert Blu-ray to lossless MKV and multi-track MOV/MP4/AVI.
  • Create 3D SBS MP4/MKV from 3D Blu-ray to Gear VR, HTC Vive, Oculus Rift, etc.
  • Support exporting forced subtitles and .srt external subtitles.
  • Make users watch BD/DVD movies on Plex, Roku, WD TV, Popcorn and more.

Pavtube DVDAid, an easy-to-use conversion tool designed for DVDs.

  • Rip DVD disc, DVD folder, DVD IFO/ISO to AVI, MP4, MKV, WMV, MOV, AAC, MP3, etc.
  • Support NVIDIA CUDA and ATI Stream (AMD APP) acceleration technologies.
  • Make it possible to play DVD movies on ATV 3, iPad 3, Nexus 7, Galaxy Tab, Asus Infinity TF700, Galaxy 3, Samsung Galaxy Note 10.1…
  • Support “Copy the entire disc” to remain DVD’s original file structure.

Pavtube BDMagic is right there standing by you to backup or convert your precious Blu-ray movies to reliable devices.

  • Convertl Blu-ray/DVD to H.265/HEVC, M3U8, MP4, etc
  • Rip BD/DVD with NVIDIA CUDA/ AMD GPU acceleration technology
  • Customize Blu-ray/DVD with built-in video editor
  • 1:1 backup BD/DVD without quality loss
  • Create 3D movies from DVD and 2D/3D Blu-ray with high audio and video quality
  • Enable you play Blu-ray/DVD on PS4, Xbox One, WD TV, Apple TV, etc.

Read: Pavtube BDMagic & Handbrake

Pavtube Video Converter Ultimate is a Blu-ray Ripper + DVD Ripper + Audio Converter + Video Converter.

  • Convert Blu-ray/DVD 3D/2D movies in batch to MP4, M4V, MOV, AVI, MKV files with 3D/2D effects.
  • Help enjoy BD/DVD movies & camcorder videos on iOS/Android/Windows Tablets & Phones, and HD Media Players.
  • Directly copy the latest releases of Blu-ray/DVD movies in fast speed.
  • Support TiVo/MXF/MTS/M2TS conversion to any other video/audio formats.
  • Add *.srt, *.ass, or *.ssa subtitle files to BD/DVD movie or videos.

Read: Handbrake vs. Pavtube Video Converter Ultimate

All of the four products are capable of realizing video conversion to almost all audio/video formats. And each of them performs its own unique functions. For more information and Mac version, please visit http://www.multipelife.com/.

What’s more, Pavtube Studio is holding on Summer Vacation Promotion. Buy Blu-ray Ripper in this period, you may get some surprise:

Related Articles:

ROKU 4 and VC1 in MKV container

Camille Wesley No Comments

It seems that even though you have a professional Blu-ray Ripper to help you rip Blu-ray to MKV, you still can’t play them freely, even on Roku 4. That’s because some Blu-ray are encoded with VC-1 and No VC-1 hardware decoder in Roku 4. So when you rip VC-1 Blu-ray to MKV, that’s VC-1 MKV and Roku 4 can’t play VC-1 MKV.

Problems about VC-1 MKV playback issue on Roku 4

“I’m looking at buying a Roku 4 but I need to know how my blu-ray rips will play. Many should play fine because they match Roku’s supported content (MKV with h264 video). But, my Lord of the Rings blu-ray rips are encoded in VC-1. Based on my research, Roku 3 will play VC-1 if it’s inside of a WMV, but not if it’s inside an MKV. How about Roku 4?”

Rokus will direct play VC-1 in a WMV container if and only if you are using an old Roku like an N1000 or other first gen Roku. But when it comes to Roku 4, accroding to their support pages VC1 has disappeared completely so I can’t really believe what is there anymore.

The following media file formats are supported:

Video — H.264/AVC (.MKV, .MP4, .MOV), on Roku 4 only: H.265/HEVC (.MKV, .MP4, .MOV); VP9 (.MKV)

Audio – AAC (.MKV, .MP4, .MOV); MP3(.MP3, .MKV); WMA (.ASF, .WMA, .MKV), FLAC (.FLAC, .MKV), PCM (.WAV, .MKV, .MP4, .MOV), AC3/EAC3 (.MKV,.MP4. .MOV, .AC3), DTS (.MKV, .MP4, .MOV), ALAC (.MKV, .MP4, .MOV, .M4A)

Image — JPG, PNG, GIF (non-animated)

Only supported file types are shown in the Roku Media Player channel. The channel hides unsupported file types.

Multichannel AAC is not supported on all Roku models. Roku TV’s and Roku 4 set-top-boxes do support multichannel decode to PCM stereo.

On Roku set-top-boxes Dolby Digital audio (AC3, EAC3) is only supported via pass through.

DTS is only supported via pass through on both Roku set-top-boxes and Roku TV’s. You must connect your Roku player via HDMI or S/PDIF to a TV or receiver capable of decoding Dolby Digital or DTS in order to hear videos with audio tracks in those formats.

Some media server software may convert files into Roku compatible formats.

DRM-protected content is not supported.

How to Play VC-1 MKV on Roku 4?

Maybe you can try to convert VC-1 MKV to H.264 MKV, or you can re-rip your Blu-ray rips to H.264/AVC MP4, MKV directly with your MakeMKV. Here, we choose to convert VC-1 MKV to Roku 4 supported format with third party video transcoder.

I choose to use  Pavtube Video Converter Ultimate to convert VC-1 MKV to Roku 4. This video converter can convert any video like H.265/HEVC, VRO, TS, AVCHD, XAVC, DJI Phantom 4 4K video to Roku 4 compatible H.264/AVC (.MKV, .MP4, .MOV) and H.265/HEVC (.MKV, .MP4, .MOV) with right audio codec. It even can rip Blu-ray and DVD to Roku 4. Recently, it has just upgraded to 4.8.6.7 version to support MKB61 Blu-ray rip. It also can directly rip Blu-ray encoded VC-1 and AVC Blu-ray to H.264/AVC MKV for Rou 4, Kodi, OHC . If you are running on Mac OS X, turn to iMedia Converter for Mac. learn >>the top 5 reasons to choose Pavtube iMedia Converter for Mac. If you haven’t got the software, download it now and let’s start the conversion.

Free download and install


Steps to Convert VC-1 MKV to Roku 4

1. Add movies

Run the Roku 4 Movie Coverter; click the Add button to load movie files to the program from your computer. You can also directly drag the video files into the program.

Roku Movie Coverter

2. Select the output format

Hit the Format box and choose Roku playable format. To store your movies on Roku 4 for widely using, you’d better encode them to .mp4, .mov, or .mkv, etc compressed format.

Learn also >> 4K to Roku 4 | MKV to Roku with Subtitle | Blu-ray to Roku

Roku video format

Tip: If you like, you can click “Settings” to change the video encoder, resolution, frame rate, etc. as you wish. Keep in mind the file size and video quality is based more on bitrate than resolution which means bitrate higher results in big file size, and lower visible quality loss, and vice versa.

3. Start to convert videos to Roku 4

Simply click the Convert button to start encoding video to MP4/MKV for Roku. Within several minutes, you can find the converted file on your computer by clicking the “Open” button.

Afterwards, it’s free to stream your converted VC-1 MKV with Roku 4. Make sure the wireless network connection is accessible among the Roku and iPad, Apple TV, PS3, HD TV or other media players. What’s more, you can also set Plex on Roku for Blu-ray/DVD playback on Roku.

News!! Pavtube Studio is holding on Summer Vacation Promotion, visit the page to see what you can get if you purchased Pavtube Video Converter Ultimate.

Related Articles:

Pavtube Blu-ray Ripper Upgraded to Decrypt Blu-ray MKB61

Camille Wesley No Comments

Hot news for Blu-ray collectors!! Are you still upset that you can’t rip your new bought Spectre 007,The Martian,The Revenant cause these new Blu-rays now have been encrypted with more complex encryption mechanism MKB61? Now, you are saved by Pavtube in that Pavtube Studio has upgraded his main 3 Blu-ray ripping tools to 4.8.6.7 version to support the new Blu-ray MKB61.

Usually, you perhaps know that Blu-ray is protected by AACS, BD+,UOP,DRM, HDCP, BD-ROM, Region codes, etc. This encryption prevents people from copying, ripping and converting their legally bought Blu-rays even they just rip it for personal use. Normal Blu-ray ripping applications on the market can rip AACS, BD+ schedule but no other difficult encryption mechanism. Even powerful as MakeMKV, supports only Blu-ray encryption up to v60, not including MKB61.

This time, Pavtube upgraded his three top-ranked Blu-ray Ripper BDMagic, ByteCopy, Video Converter Ultimate to the newest 4.8.6.7 version supporting to decrypt new Blu-ray encrypted with AACS, BD+,Region codes, HDCP up to MKB61.Now, let’s learn the upgrade and the main features of each Blu-ray ripping tool.

What’s new?

1.support latest Blu-ray MKB61.

2.fix some bugs.

Key features of ByteCopy

– 1:1 backup BD/DVD with original video structure.

– Main title copy BD/DVD with smaller size.

– Copy BD/DVD to MKV with lossless quality.

– Convert BD/DVD to MP4/MOV/AVI with multiple subtitle/audio streaming.

More functions of ByteCopy is in the review.

Key features of BDMagic

– Full copy and directly copy Blu-ray and DVD

– Convert Blu-ray/DVD to SD/HD MP4, MKV, AVI, etc to NAS, External Hard Drive, Media Server, etc.

– Convert 4K Blu-ray to H.265/HEVC 4K MP4/MKV

– Rip Blu-ray preserving AC3, AAC, DTS audio in stereo, 5.1, 7.1 sound.

More functions of BDMagic is in the review.

Key features of Video Converter Ultimate

– Decrypt Blu-ray and DVD to virtually any SD/HD video

– Convert 4K Blu-ray to SD/HD MP4, WMV, MOV, QuickTime, ProRes for editing in NLE.

– Copy Blu-ray/DVD to M3U8 for HTTP live streaming

– Convert, shrink, compress Blu-ray, DVD to YouTube, FaceBook, Vimeo, Instagram, Google Plus, etc.

More functions of Video Converter Ultimate is in the review.

The Blu-rays you can Decrypt:

You can use Pavtube Blu-ray Ripper to decrypt some new released Blu-ray including: The Revenant, The Martian, Hannibal TV Series, Game of Throne (1-6), Spectre 007, Zootopia, Harry Potter, Independence Day, The Divergent Series: Allegiant, The Walk, Avatar, House of Cards, Bridge of Spies, Mad Max: Fury Road, Room, Spotlight, By the Sea, The Family Fang, Absolution, Roots, Code of Honor, Now You See, The Adderall Diaries, Arch Angels, Shchedrin: The Left-Hander, Sherlock, Ghost Rider / Hellboy, The Da Vinci Code, The Da Vinci Code, Doro: Strong and Proud, etc.

What’s more, Pavtube Studio is holding on Summer Vacation Promotion. Buy Blu-ray Ripper in this period, you may get some surprise:

In addition, Pavtube Studio also upgraded his Video DVD Converter Ultimate to support users to rip any new released commercial DVD discs to MP4, MOV, MKV, 3GP for using on iPad Pro, iPhone 6S, Galaxy S7/S7 Edge, HTC 10, Nexus 6p, Xperia Z6, etc.

Src: http://i-loveshare.com/pavtube-4-8-6-7-upgrade/

Copy DVD to Exteral Hard Drive For Streaming on TV/Laptop/PC

Camille Wesley No Comments

No matter it is an expansive collection of DVDs or a lot of older DVDs sitting around in your house, copying these DVDs to an External Hard Drive would be a great way to streaming. Once made backups of your DVD collection to Exteral Hard Drive, you can stream your DVD movies on HD TV without using DVD Player and DVD discs, preventing from DVD disc scratching and damaging, and save the space on your cupboard. You can see many needs about the DVD to Exteral Hard Drive backup:

"I am trying to download some movies onto our external hard drive so that I can plug it into my laptop and watch movies on the plane. Can anyone help me with this and will it work?" – from tomshardware.com

" I’ve got hundreds of DVDs at my apartment but get tired of lugging them around so I wanted to get an external hard drive and just watch my movies Via that, plus I’ll have them all with me at the same time which will be cool. I’ve got zero experience with this sort of thing so was hoping I could just get a quick list of what I’ll need to accomplish this, I.e. programs, etc. All of these are store purchased and not burned DVDs if that makes a difference in what you have to use? Also how many movies could someone potentially store on a 1TB drive ?" – from .tomsguide.com

So just let’s start to copy DVD to Exteral Hard Drive For Streaming on TV/Laptop/PC/PS4/PS3, ETC.

Preparation

A DVD Ripping Tool – You can rip unprotected DVDs with Handbrake but for commercial DVDs, you have to turn to a professional DVD ripping tool to remove the copy protection. If you don’t mind all the DVD rips are MKV files, you can use MakeMKV. But I prefer Pavtube ByteCopy for its DVD (and Blu-ray) decryption power. It supports to decrypt AACS, BD+ up to v61 while MakeMKV only supports up to v60. And ByteCopy can 1:1 backup DVD movies, main title copy DVDs and convert DVD to lossless MKV, Multi-track MP4/AVI/MOV, SD/HD MKV, MP4, WMV, AVI, 3GP, 3D SBS MKV/MP4, H.265 MKV/MP4, 4K MP4, etc. For more functions, you can refer to its review.

DVD discs – It depends on what DVD ripping software you choose. If you choose Handbrake, your DVDs should be unprotected. If you are using ByteCopy, you can copy any DVD to External Hard Drive like the new released House Of Cards, Hannibal, The Walk, Spectre 007, The Martian, Game of Thrones Complete Seasons (1-6), etc.

A Computer – Note: If you are using a Mac, you shoulf use Pavtube ByteCopy for Mac.

Start to Copy DVD to Exteral Hard Drive

Firstly, please download and install your DVD ripping tool:

  .

Step 1: Run DVD ripping tool and insert your DVD to internal/external drive and click “File” to load the DVD discs to copy DVD to External Hard Drive. DVD discs, DVD folders, DVD IFO/ISO are all supported.

Tips:
1.You can add more than one DVD movies at a time for its batch conversion function.

2. You can choose desired subtitle and audio track and forced subtitle below the chapter list.

ADD DVD MOVIES

Step 2: Now you should choose a way to copy DVD to External Hard Drive.
Here, you have three choices:

Option A – Full Disc Copy DVD to Exteral Hard Drive

You can keep all the information in DVD movies, including main title, advertisement, chapter markers, review and the whole audio/subtitle streams.

Click  on the top of the menu.

Option B – Directly Copy DVD to Exteral Hard Drive

Just the main title of the original DVD disc will be preserved in this way. It will save many space on your hard drive. 

Navigate to “Format” > “Copy” > “Directly Copy” 

Option C – Convert DVD to MP4/MKV/MOV to Exteral Hard Drive

Transforming DVD to MP4, MKV, MOV, AVI, etc popular format gives you wide playback on different devices such as Samsung TV, LG TV, PS4, PS3, Xbox One, Tablet, Laptop, etc via Exteral Hard Drive. 

Click “Format”, you can choose the desired format in “Common Video” or “HD Video” profiles. On the other hand, you can choose the optimized preset for mainstreaming multimedia players, like PS3/PS4, TV, HD Media Player, etc. If your devices support MKV format, you also can choose lossless MKV format.

Note: In the third way, you can adjust the video/audio parameters in “Settings” to determine the output video size. 

Step 3: If you chose the latter two ways, click big red “Convert” on the UI to begin copying DVD to External Hard Drive. Locate the generated video in output folder.

Copy DVD to Different External Hard Drive for Different Devices Playing

Copying DVD to LaCie Fuel allows people to stream DVD movies with a Mac or PC However, it also has built-in wifi too, which will allow you to transfer files to or from an iPhone or iPad when you need to.

Saving DVD movies to iPocket Drive also can make you playing your DVD movies on Mac and PC. But it also can enable you to play movies on iOS devices. It’s compatible with the iPhone 5/5s/5c/6/6 Plus, the iPod Touch (fifth generation), the iPad 3/4/Air/Air 2 and the iPad mini 2/3.

There are some other best external desktop and portable hard disk drives that can save your DVD backups.

1. Best external desktop hard disk drive

  • Maxtor D3 Station
  • Seagate 5TB Expansion
  • Seagate STEB4000200 4TB Expansion
  • WD My Book 8TB
  • Seagate Innov8 8TB
  • WD My Book Duo 16TB

2. Best external portable hard disk drive 

  • Maxtor M3 4TB hard disk drive
  • WD My Passport 2TB
  • Seagate Wireless Plus 2TB
  • iStorage diskAshur 2TB

Of course, there must be other excellent External Hard Drive to store your DVD rips. When you copied DVD to External Hard Drive, you can stream your DVD movies on TV/Laptop/PC freely. Apart from External Hard Drive, saving DVD to NAS is another great way to store and play your DVD movies.

Related Articles:

VC-1 mkvs playback in Kodi

Camille Wesley No Comments

Usually, when you ripped Blu-ray to MKV, you can play these Blu-ray MKV rips in Kodi successfully. But there is an exception that you can’t play the MKVs in Kodi, under which condition the Blu-ray is encoded with VC-1. Say it, Kodi can’t play AC-1 MKV files.

Similar Search: Blu-ray to Kodi | 4K to Kodi | DVD to Kodi | iTunes to Kodi

Problems of VC-1 mkvs playback issue in Kodi

“Hi all, I’m experiencing issues with mkv files encoded in VC-1 (Blu-ray rips) in Kodi. Playback’s fine for a few minutes then it gets all jittery/stuttering.” –  From wetekforums.com

“I have a kdlinks a300 and am having issues playing blu-ray rips in Kodi 15.2. All of my files were created with Make MKV, but I’ve noticed that the ones that are h.264 seem to play fine, while the ones that are VC-1 stutter and artifact and play at a low frame rate – around 13 fps or so – making them unwatchable. The audio seems to work okay, but the video looks terrible.” – From forum.kodi.tv

“I have recently built a HTPC in which I’m using the on board Intel 4600 graphics. All my blu rays are folder rips , the majority of which play perfectly OK. However, all the VC1 format movies are unwatchable in Kodi with severe blocking and flashing artefacts.” – From forum.kodi.tv

“Hi, I am experiencing playback problems with VC1 mkv’s using XBMC. I have tried same source files in powerdvd and they work fine.” – From forum.kodi.tv.

From all the AC-1 MKVs troubles in Kodi, you can see when you change changed Kodi to PowerDVD, your AC-1 MKVs can be played fine. So the main reason is likely Kodi problem. When you meet AC-1 MKVs playback issue in Kodi, you can download MX Player App and try playback from a USB stick to Eliminate Kodi from the equation.

Or software decoding should be used to change AC-1 to H.264 cause Kodi can play H.264 MKV finely.
Pavtube Video Converter Ultimate is recommended here to help you convert AC-1 mkvs to H.264 for Kodi/XBMC playing. This video encoder/decoder can convert AC-1 MKVs, even AC-1 Blu-ray to H.264 MP4, MKV to play in Kodi on Amazon Fire TV (2015), Open Hour Chameleon, Nvidia Shield, etc. It allows you to adjust video bitrate, frame rate, codec, size and audio channel, bitrate, sample rate, codec so that you can change your 23.976 AC-1 MKVs to lower 24 fps for Kodi. It has more other functions, you can read its review.

If you are using a Mac, please turn to the equivalent Pavtube iMedia Converter for Mac which can help you remux AC-1 MKVs to H.264 video for Kodi on Mac OS X 10.11 El Capitan, Mac OS X 10.10 Yosemite, 10.9 Mavericks, 10.8 Mountain Lion, 10.7 Lion, 10.6 Snow Leopard, 10.5 Leopard.  learn >>the top 5 reasons to choose Pavtube iMedia Converter for Mac. 

Free download and install
 

How to Convert AC-1 MKVs to H.264 for Kodi?

Step 1. Import AC-1 MKV videos

This program offers you two ways to upload your AC-1 MKV videos. You can either click the “Files” button to browse your hard disk or local directories and load the target files or simply drag your localAC-1 MKV videos onto the interface. The software supports batch conversion.

Step 2: Choose H.264 Codec vidoe for Kodi

Click “Format” to open the drop-down list. Here you can choose HD MKV or HD H.264 MP4 video for Kodi playback.

Note: The newest Kodi version supports H.265, so you can choose “Format > HD Video” to select “H.265 Video (*.mp4)” as the output format.

Step 3: Custom Video (Optional)

If needed, you can open “Settings” window. Here you can make sure the output video size to be 1080p. And you can adjust video frame rate from 30 to 24 or other number.

Step 4. Convert AC-1 MKVs to Kodi

Click the “Convert” button at the bottom-right corner of the interface to convert the AC-1 MKV files to your Kodi. This Video Converter will finish AC-1 MKV video to Kodi supported video conversion in just a few minutes.

After transcoded AC-1 MKVs to H.264 video, your Kodi on Amazon Fire TV, Open Hour, Samsung TV, Nvidia Shield, etc should be able to play them finelly.

Hot News!!: Pavtube Studio is holding on Summer Vacation Promotion. In the promotion period, you can get $10 Amazon gift card only if you are the first 30 people to buy Pavtube Video Converter Ultimate. You can contact our customers service staff after you purchased the software at support@pavtube.com.

Warm Tip: If you use Pavtube ByteCopy for Windows/Mac, you can directly rip Blu-ray to H.264 MKV then you won’t have MKVs playback issue in Kodi.

Related Articles:

Top 10 HD Video Converter Reviews

Camille Wesley No Comments

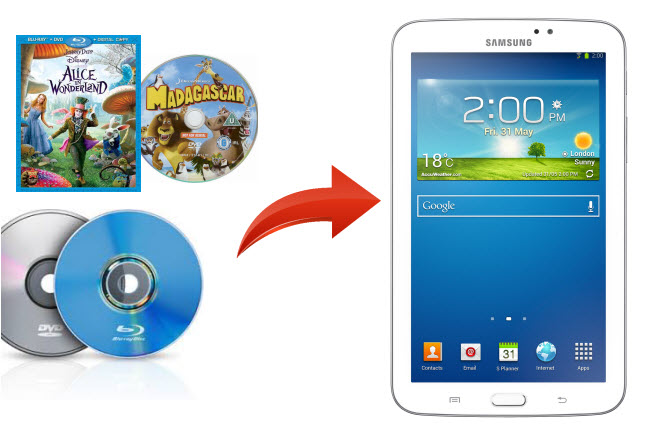
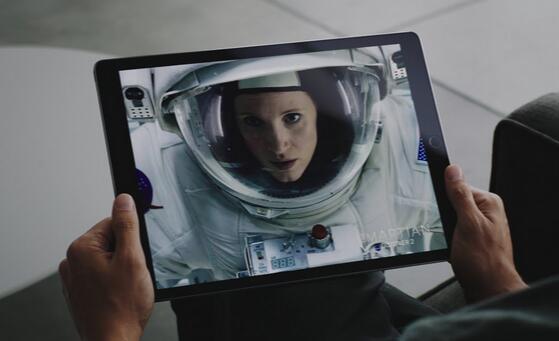
Perhaps, you have a travel video diary shot with your DJI Phantom 4 or a footage about your birthday party video recorded with your GoPro HERO 4, when you want to edit these precious video memory and upload to Facebook/YouTube to share with your friends, you will be disappointed for the too high resolution and incompatible format. In this case, you need a HD Video Converter to convert the HD video to play, edit, upload for sharing.

HD Video Converter

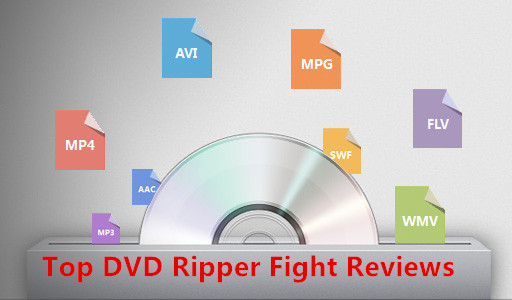
A HD Video Converter can convert 2160p/1080p/720p MKV, MOV, MXF, MTS, M2TS, M2T, AVCHD, XAVC, TS, MP4 videos generated by DJI Phantom, GoPro, Sony, Canon, Nikon, Panasonic, and JVC to  Flash Video/ YouTube video (*.flv, *.f4v), HD Video (*.tod, *.mod, *.mts, *.m2ts, *.mkv, etc. ), General Video (*.avi, *.mpg, *.wmv, etc.) and more for free playback, editing, uploading, burning. Now, there are many HD Video Converters on the market, in order to help our users choose the right HD Video Converter, we has been tested and compared nearly a hundred HD Video Converters on the market,  and finally we confirmed eight best 10 products for your reference.

Top 1. Pavtube Video Converter Ultimate

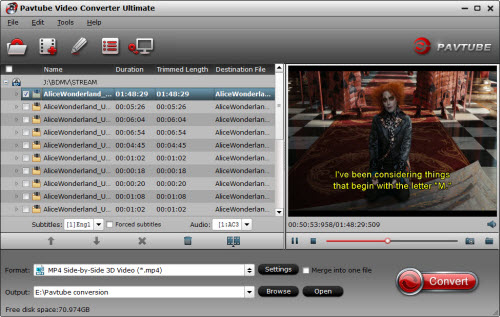
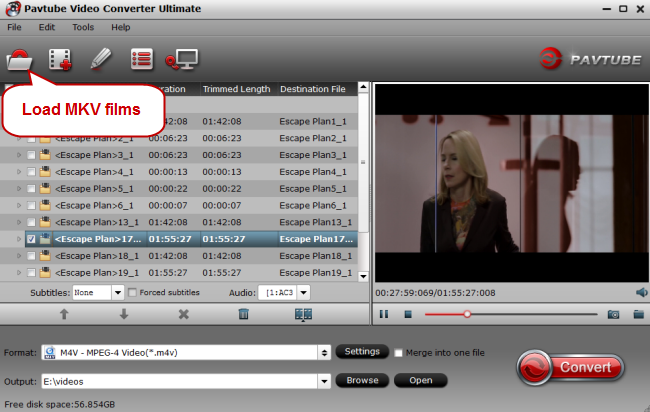
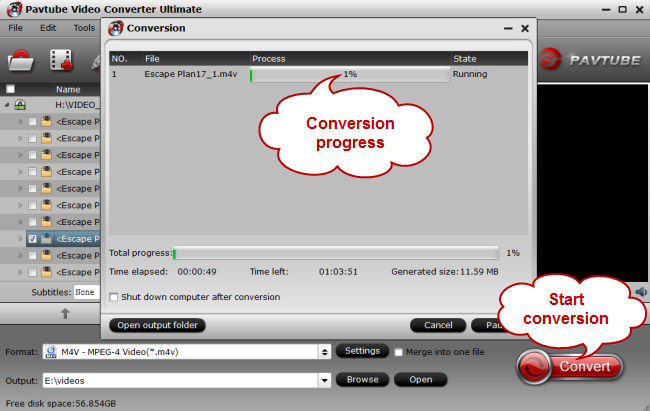
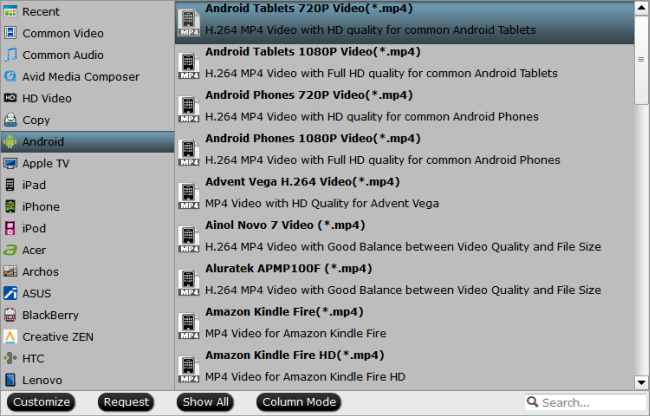
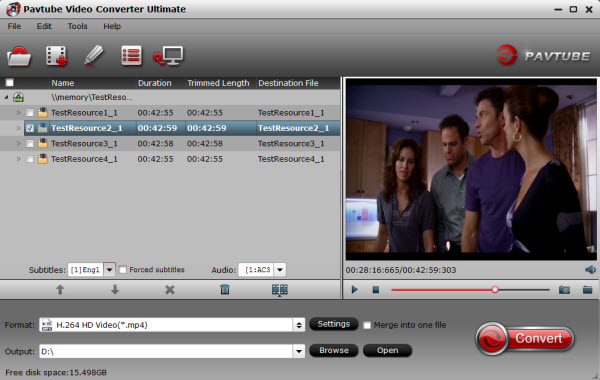
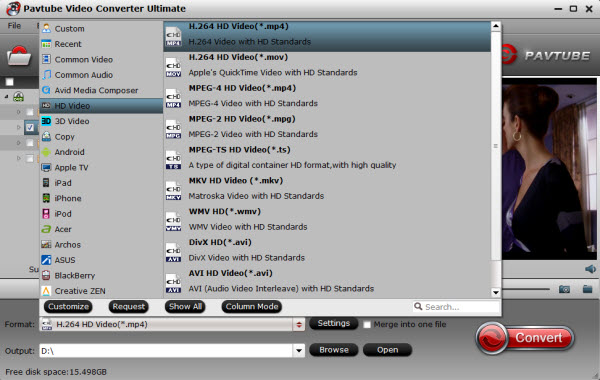
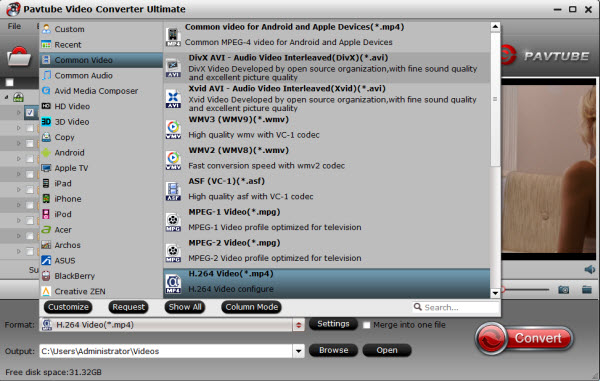
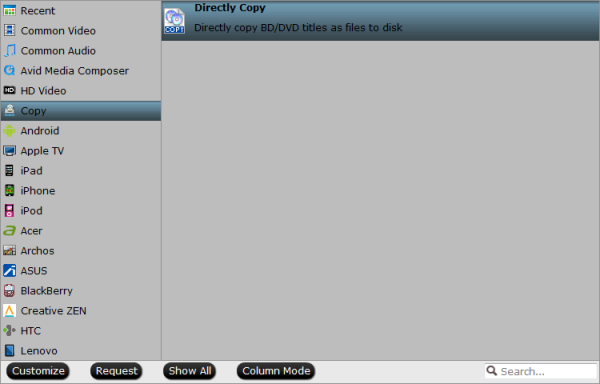
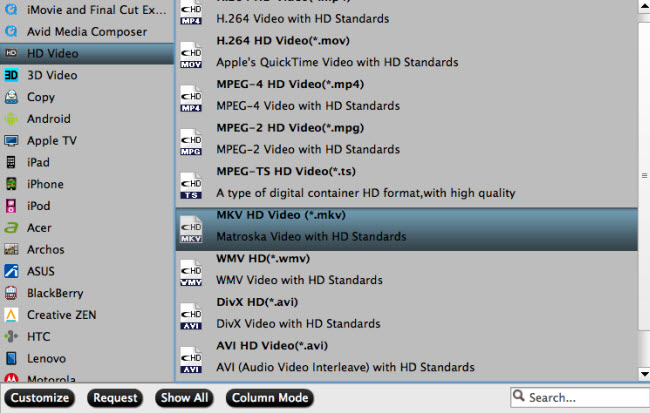
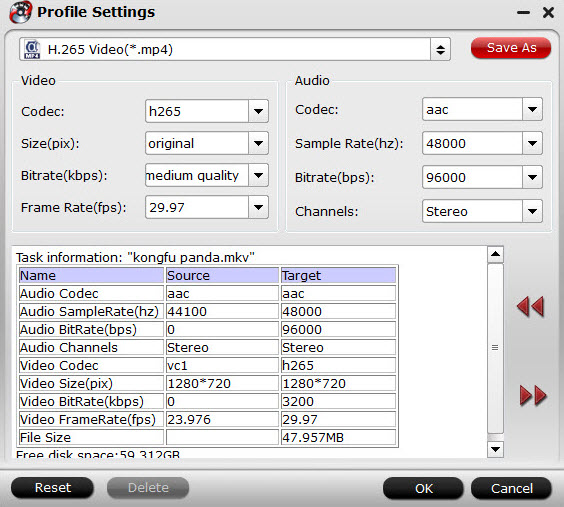
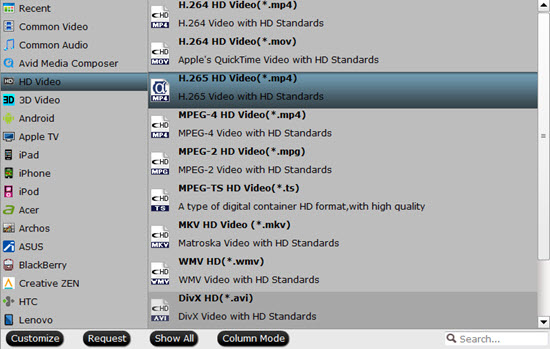
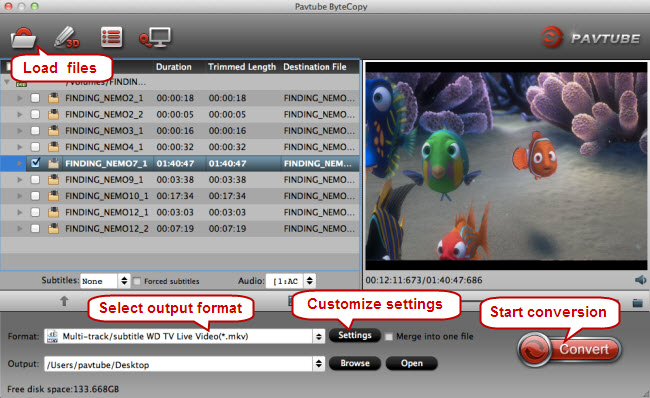
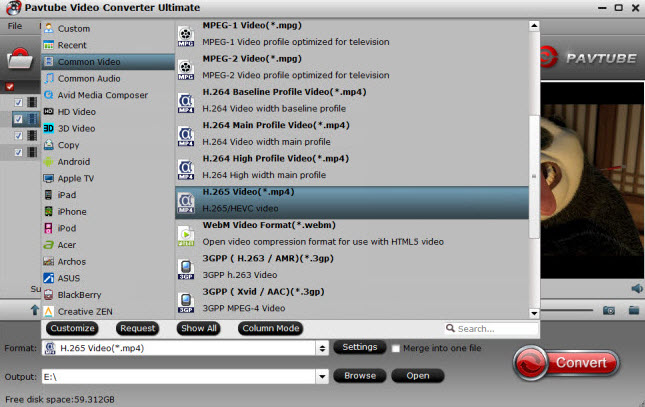
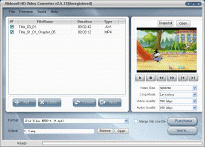
Pavtube Video Converter Ultimate is a multi-format video converter. It was designed to convert high-definition videos from camcorders, digital video recorders and the like into popular video formats, including H.265/HEVC, AVCHD, XAVC, M2TS, MTS, M2T, MKV, MP4, H.264, VOB, MPG, MOV, AVI, DV, TS, FLV, 3GP, etc. so that you can enjoy the HD videos on Android Devices, Windows 10 Devices, iPad Pro, iPhone 6S, Apple TV 4, PS4, Xbox One, WD TV player, DVD player, and edit in Avid Media Composer, Adobe Premiere, Sony Vegas, Cyberlink Power Director, Avid, Magix Movie Edit Pro, Davinci, etc.There are also video editing functions available. With the built-in video editor, you can trim and crop the video, add text or image/video watermarks, effects and replace the audio track of your video file. You can preview changes to your videos in real time. There is a video player in the main window – it allows you to view your videos as well.

Mac Version: Pavtube iMedia Converter for Mac

Key Feature:

  • Convert 3840p/2160p/1080p/720p HD videos like MXF, MTS, TiVo, MOV, MKV, VOB…to any file types.
  • Transcode HD video files for editing with Sony Vegas, Adobe Premiere Pro, Windows Movie Maker, Pinnacle Studio, etc.
  • Re-encode DJI Phantom 4, GoPro HERO 4, Canon XC10, etc 4K AVCHD, XAVC, MTS, MXF, MP4, MOV, etc.
  • Edit video such as crop, trim, merge, add watermark/subtitle, rotate, effects and many more.
  • DIY video and audio size, codec, frame rate, sample rate, bitrate, channel.
  • Support NVIDIA CUDA and ATI Stream (AMD APP) acceleration technologies.

Pros:

  • It works well
  • Supports both SD and HD, even H.264/H.265 4K videos
  • Offers support for many multimedia formats
  • Good conversion profiles
  • Supports batch conversion
  • Also can rip 4K Blu-rays
  • Fast conversion speed
  • Perfect customer service

Cons: Can’t burn HD video to DVD.

Top 2. Xilisoft HD Video Converter

Xilisoft HD Video Converter is a professional HDTV converter tool designed to transform your video to various high definition video formats like HD ASF Video, HD AVI Video, HD H.264 Video, HD Quick Time Video, and HD MPEG4 Video. It can convert TS to WMV HD, AVI to TS HD, WMV HD to TS HD. Xilisoft HD Video Converter can also convert audio to audio, video to audio and picture. The HD Video Converter also supports the H.264 video format, offering much higher efficiency than MPEG2 standard used in DVD videos.

Mac Version: Xilisoft HD Video Converter for Mac

Xilisoft HD Video Converter

Key Feature:

  • Support HD videos such as AVCHD (mts, m2ts), TS, H.264/AVC, MKV.
  • Convert popular formats like AVI, MPEG, WMV, MP4, DivX, RM, MOV, and FLV.
  • Convert HD to SD videos and audios; supports CD decoding.
  • Transfer output files to iPad/iPad2/iPhone 4/iPod/PSP/iTunes directly after conversion.
  • Support NVIDIA CUDA & ATI Stream technology.

Pros

  • Very ease to use
  • Good compression and fast process

Cons

  • Takes a lot of CPU
  • Output can be a big file

Top 3. Wondershare HD Video Converter

Wondershare HD Video Converter is the powerful and easy-to-use High Definition Video Converter which also can convert between popular video formats. It helps to make your ideal HD videos just right to share online with your friends and family without formats or size limitations.

Mac Version: No

Wondershare HD Video Converter

Key Feature:

  • Convert camcorder AVCHD video (M2TS, MTS, M2T) to other HD video or SD video.
  • Convert Tapeless Camcorder Video MOD (JVC, Panasonic, Canon) and TOD (JVC) to AVI, MP4, WMV etc.
  • Perfectly convert HD videos including MTS, M2TS(AVCHD H.264), TS(MPEG-2), HD MKV(H.264, MPEG-2 HD), HD WMV(VC-1) and HD MOV(H.264, MPEG-4) to SD (Standard-Definition) videos and audios.
  • Convert between various stand video formats including MP4, MOV, 3GP, AVI, WMV, MKV, RM, MPEG-1, MPEG-2, FLV, ASF and NSV.
  • Extract audio from HD videos or SD videos to M4A, WMA, WAV, MP3, AAC, AC3, APE, MKA, OGG, AU, AIFF, FLAC, etc.

Pros

  • This hd video converter can handle almost any video file type, and it has an impressive list of editing tools

Cons

  • It’s batch converting feature has some limitations
  • A serious problem for me is that the sound is not perfectly in sync with the video when converting videos
  • I have a Quad core Phenom 9950 CPU and this runs it at 100% which is unforgivable for such a small programme, plus conversion is very slow

Top 4. Leawo HD Video Converter

Leawo HD Video Converter is a powerful solution for HD video format conversion. Designed to convert HD video to many popular formats, like AVCHD to AVI, MOD/TOD to MP4, MTS/M2TS to MKV, etc., this high definition video converter (HD Video converter) fully supports 720p and 1080p HD videos. This powerful HD video converter is also featured at good audio/video synchronization, clear picture quality and smooth output. For advanced users, the program provides handy video edit functions to trim HD video length, crop HD video display size, add image and text watermarks and adjust video effects in several factors. Professional conversion settings are also available such as video bit rate, frame rate, audio channel, etc. for custom conversion.

Mac Version: Leawo Mac HD Video Converter

Leawo HD Video Converter

Key Feature:

  • Convert HD Video to Common and 3D Video.
  • Output Video with Customized Settings and Effects.
  • Useful Functions for Best HD Conversion Experience.

Pros

  • It lets you extract audio from your videos
  • It’s very easy to use
  • Intuitive graphic interface

Cons

  • No customer support actually exists – in spite of links on the website

Top 5. Aimersoft HD Video Converter

Aimersoft HD Video Converter is the high definition video converter software of all HD Video Converters for you to convert HD video files with high quality. With this HD video converter you can also easily convert among HD video

formats, convert video to HD, convert HD videos to SD (Standard-Definition) videos. The HD video converter supports most of HD video formats such as AVCHD (mts, m2ts), H.264/AVC, MKV, MPEG-2 (ts), HD WMV, MPEG-4 and Quick Time.

Mac Version: No

Aimersoft HD Video Converter

Key Feature:

  • Convert HD videos including AVCHD (mts, m2ts), TS, H.264/AVC, MKV, Convert HD videos to SD videos and audios.
  • Support all common video and audio output formats.
  • Powerful Video editing function.
  • Customize video converting.
  • Support video capture and save your favorite movie pictures on your computer as jpeg or bmp files.

Pros

  • Very well designed and presented
  • Lots of input formats
  • Allows minimal editing

Cons

  • Doesn’t output in as many formats as inputs
  • Doesn’t support all mobile devices

Top 6. Aiseesoft HD Video Converter

Aiseesoft HD Video Converter is best HD Video Converter to convert HD video to general video, convert general video to HD video, and among HD videos. Furthermore, this HD Video Converter can convert HD video, general video and almost all audios to AAC, AC3, AIFF, AMR, AU, FLAC, MP3, M4A, MP2, OGG, WAV, WMA.

Mac Version: Aiseesoft HD Video Converter for Mac

Aiseesoft HD Video Converter

Key Feature:

  • Convert HD videos and general videos.
  • Convert audio files.
  • Edit output video effect.
  • Bring much faster converting speed with AMD APP and NVIDIA? CUDA? GPU Processing acceleration technology.

Pros

  • Powerful video convert function
  • Product works decent
  • It allows you to add a video watermark
  • Fast conversion speed.

Cons

  • Worst Customer Service.
  • Aiseesoft doesn’t care about their customers, want to make a buck at our expense!

Top 7. Tipard HD Video Converter

Fully support most HD(High-Definition) video encoder and HD decoder, Tipard HD Video Converter can convert 1080P, 720P and other HD video to general video, convert general video to HD video, convert among HD videos, such as HD TS, HD MTS, HD WMV, HD MPG, HD MPEG4, H.264/AVC, HD AVI, HD ASF, etc. Moreover, this HD Video Converter has audio conversion and audio extraction functions. Using Tipard HD Video Converter, you can easily get any segment of the videos, adjust video frame size, set video effect, add watermark, and merge videos. Plus, with newly adopted NVIDIA? CUDA? technology and multi-core CPUs supporting technology, the converting speed is 6X faster now.

Mac Version:Tipard HD Video Converter for Mac

Tipard HD Video Converter

Key Feature:

  • Convert among HD videos.
  • Convert HD video to general video.
  • Convert general video to HD video.
  • Edit your video.

Pros

  • It has a friendly, simple and very intuitive interface
  • It captures video from multiple devices in real-time
  • It eases the selection of video fragments and their composition
  • It includes numerous image effects and predetermined transitions

Cons

  • No “keep original resolution” option
  • The output profiles for specific electronic devices are not always up-to-date
  • Developer claims you can trim input files with this program but it isn’t very clear how to trim
  • The trial is only available for Windows.
  • It’s only available in English.
  • High system requirements to fully use the application.

Top 8. Nidesoft HD Video Converter

A professional HD Video Converter tool – Nidesoft HD Video Converter, with its powerful decode technology, could support decoding and encoding of all format High-Definition movie files. You could convert HD videos to other popular formats and download to your iPod, iPhone, BlackBerry, MP4 player, etc…

Mac Version: No

Nidesoft HD Video Converter

Key Feature:

  • HD video decoding and encoding.
  • More profile settings.
  • Safe to install and viruses-free.
  • Batch conversion and merge into one file.

Pros

  • Good format support
  • Easy to use
  • Preview window
  • Basic editing tools

Cons

  • Not very attractive
  • No advanced configuration options
  • Only one car and three tracks

Top 9. ImTOO HD Video Converter

ImTOO HD Video Converter is a HD Video converter and HD encoder software designed to transform your videos to diverse high definition video formats like HD ASF Video, HD AVI Video, HD H.264/AVC Video, AVCHD video, HD Quick Time Video, HD MPEG4 Video, etc. e.g. convert AVI to HD, convert MKV files to HD. On top of this, it can also convert audio to audio, video to audio and picture, as well as create videos from pictures.

Mac Version: ImTOO HD Video Converter for Mac

ImTOO HD Video Converter

Key Feature:

  • Convert HD videos in Full-HD 1080p.
  • Convert HD videos to different video formats.
  • Extract music/pictures from videos & convert music to different formats.
  • Makes different videos playable on devices such as iPod, iPhone, Apple TV, PSP, PS3, Xbox & many others.

Pros

  • Great interface
  • Great format support
  • Lots of new profiles
  • Up-to-date with the most recent devices
  • Video editor

Cons

  • No video editor
  • Some features are hard to find

Top 10. OJOsoft HD Video Converter

OJOsoft HD Video Converter is the best HD video format converter which can deal with HD video files with easy procedure and lossless quality. Specifically, it can convert among HD video files, convert video to HD, convert HD videos to SD (Standard-Definition) videos.

It can be used like Apple TV video converter, Xbox 360 video converter, PS3 video converter, iPhone video converter, 3GP video converter, PSP video converter, iPod video converter, and Zune video converter to convert any HD and SD video formats to your mobile phone, Sony PSP, PS3, video iPod, Apple iPhone Apple TV, Microsoft Xbox, Zune video player and other HD portable video players.

Mac Version: No

OJOsoft HD Video Converter

Key Feature:

  • Support converting video files from one format to another.
  • Support convert HD Video to SD(Standard Definition) Video or convert SD Video to HD Video.
  • Unmatchable converting speed, wonderful output quality.
  • Support batch conversion with a task list.
  • Windows Vista supported.
  • Optimized for HD video devices, including PS3, Xbox360, Apple TV, HD DivX/XviD video player and more.

Pros

  • Simple once you know how!
  • it is so flexible and allows you to convert between SD and HD so easily.

Cons

  • it will be much better if the price can be a little lower.

Summer Vacation Promo – Get Amazon $10 Gift Card Buying iMedia Converter

Camille Wesley No Comments

The Summer Vacation is coming. Have you prepared the plan to enjoy your Sun Holiday? A travel is a nice idea. But if you love to stay at home, watching movies is also a not bad idea. You might haven’t watched the hot Warcraft, Independence Day:Resurgence and Now You See Me 2. If so, just go to the cinema. However, for the movies released in the first quarter of the year, only can you watch HD downloads or stream Blu-ray/DVD version.

Summer Vacation

In the first quarter of the year, there are indeed some highly rated movies such as Zootopia, London Has Fallen, The Divergent Series: Allegiant, etc. if you want to see them, you perhaps have to download them from torrent sites. Or you only can purchase the Blu-ray and DVD versions from Amazon.

When you download the movie you want to watch from YouTube, YIFY and other video download sites, you probably meet some video playback issue. For example, you can’t play your YouTube FLV downloads on your iPads or play the YouTube video with Windows Media Player on PC. In this case, you need a video transcoder.

Pavtube iMedia Converter for Mac is a top-selling video converter designed for Mac users. It can re-encode any video to another popular format. It also can rip Blu-ray to PC and copy DVD to Hard Drive in any digital format you need. Read its main functions below:

  • Built in numerous video audio codecs, it is powerful enough to transcode videos among virtually all video/audio formats, including MKV, HEVC (H.265), M2TS, AVCHD, FLAC, MP3, MP4, MOV, AVI, WMV, MPEG, FLV, VOB, 3GP, etc.
  • Rip any new released Blu-ray and DVD discs.
  • Optimized preset output profiles make it easy to transcode videos to iPhone, iPad, Apple TV, Android tablet, Samsung Galaxy S6 Edge+, Galaxy S7, Google Nexus 6p, Kindle Fire HD, PS4, Xperia Z5/Z6, Microsoft Surface Book, Surface Pro, etc.
  • Support TrueHD audio and keep 7.1/5.1 audio while ripping Blu-ray
  • This video transcoding software is designed to transcode videos at any resolution, including 1080p, 2160p 4K and 4320p 8K.
  • Support MXF in XAVC video codec
  • Ease of Use This all-in-one product has a very user-friendly interface and every option is placed in a simple way.
  • Excellent Built-in Video Editor As a powerful video converting software, it provides dozens of video editing functions, including: trim video length, crop video size, split large video into segments, add watermarks, adjust video effect.

And the big surprise is, to reward the customers, Pavtube Studio decided to give Amazon gift cards for the first 30 buyers to help you buy Blu-ray and DVD discs cheaper at Amazon:

If you are the first 10 buyers, you can win Amzon gift cards that worth $10

If you are in the 11 to 30 buyers, you can win Amazon gift card that worth $5

Notes: After you purchase the product, please contact Pavtube Studio with the email address: support@pavtube.com. If you are the first 30 buyers, you can get Amazon Gift Card free. Remember, you have to contact with Pavtube customer service staff at the e-mail, otherwise, you can’t get the gift. The rumor said that no one get the gift, so be the first one.

If you are not the first 30 people to get free Amazon gift card, visit the Pavtube Summer Vacation Promo page to see other promotion activity.

Related Articles:

View 4K videos on Samsung TV via Roku 4

Camille Wesley No Comments

4K is the mainstreaming in the future, that’s why 4K TV having eaten more market share than 3D TV. But it doesn’t mean you can play 4K video only on a 4K TV. For example, you can play 4K video on Samsung TV via Roku 4 since Roku 4 supports video files with 4k resolution. It allows people watch 4K video on any TV hooked to the Roku 4. It does not need to be a 4k TV. That means, if you have a normal Samsung TV, you still can stream 4K video on it via Roku 4. 


To stream 4K video on Samsung TV via Roku 4, you need to know which video can be played or pass through via Roku 4 to TV. 

What media file types does the Roku Media Player channel support? 

The following media file formats are supported: 

  • Video — H.264/AVC (.MKV, .MP4, .MOV), on Roku 4 only: H.265/HEVC (.MKV, .MP4, .MOV); VP9 (.MKV)
  • Audio – AAC (.MKV, .MP4, .MOV); MP3(.MP3, .MKV); WMA (.ASF, .WMA, .MKV), FLAC (.FLAC, .MKV), PCM (.WAV, .MKV, .MP4, .MOV), AC3/EAC3 (.MKV,.MP4. .MOV, .AC3), DTS (.MKV, .MP4, .MOV), ALAC (.MKV, .MP4, .MOV, .M4A)


Samsung LED/SUHD TV Supported Video/Audio Formats 

Video Resolutions and Codecs 


Only supported 4K file types are shown in the Roku Media Player channel when streaming to Samsung TV. If your 4K video is not supported by Roku, it will hide the unsupported 4K files. So, if you download some 4K YIFY video, 4K ISO images, 4K YouTube FLV video or some 4K shootings from DJI Phantom 4 4K video, you’d better convert these 4K video to Roku 4/Samsung TV supported format. 

There are a number of tools capable of converting videos into a format that is playable on the Roku player and Samsung TV.  One of the more popular ones is called Handbrake. We have found that the Handbrake preset, “Regular – High Profile”, produces files that play well on Roku. However, today the 4K Video Converter we want to recommend is Pavtube Video Converter Ultimate. Learn >> Handbrake vs Pavtube Video Converter Ultimate : Which One Is Right for You? 

Pavtube Video Converter Ultimate – Convert 4K Video to Roku 4 Streaming on Samsung TV 

Pavtube Video Converter Ultimate is a professional 4K video converter on Windows 10/8.1/8, etc (Mac version supports El Capitan. It can transcode 4K video to Roku 4 supported and Samsung TV playable format. It also can make you edit 4K video, compress 4K video to 1080p/720p/480p, even  upscale your SD/HD video to  4096×2160 or 3840× 2160 resolution for your 4K TV, 4K tablet, 4K projector, etc 

Key features: 

  • Convert any video in 3840 x 2160 or 4096 x 2160 4k resolution to H.265 MP4/MKV for Roku 4 streaming on Samsung TV.
  • Transcode your iPhone 6S, Galaxy S7, Sony Xperia Z5/XA 4K shootings to Roku 4.
  • Rip 4K Blu-ray to 4K MP4/MKV for Samsung TV and Roku 4.
  • Re-encode DJI Phantom 4, GoPro HERO 4, Canon XC10, etc 4K AVCHD, XAVC, MTS, MXF, MP4, MOV, etc.
  • Solve 4K video playback issues on Himedia Q10 Pro, Nvidia Shield Android TV Box, Apple TV 4, Boxee, etc.
  • Edit simply 4k video such as crop, trim, merge, add watermark, rotate, effects and many more.


Free download and install 
  

Steps to Convert 4K video to Roku 4 streaming on Samsung TV 

Step 1. Import 4K videos 

This program offers you two ways to upload your 4K Video files. You can either click the “Files” button to browse your hard disk or local directories and load the target files or simply drag your local 4K videos onto the interface. The software supports batch conversion. 


Step 2. Choose output format for Samsung TV 

Hit the Output Format drop-down menu and go to “Format > TVS” to select “Samsung TV” as the output format. The optimized output format will contains the best video settings for playback on your Samsung smart TV and will be supported well by Roku 4. 


Note: If your Samsung TV is 4K model and support H.265, you can choose “Format > HD Video” to select “H.265 Video (*.mp4)” as the output format. 


Step 3: Custom 4K Video 

Audio Settings: 

Multichannel AAC  is not supported on all Roku models. Roku TV’s and Roku 4 set-top-boxes do support multichannel decode to PCM stereo. On Roku set-top-boxes Dolby Digital audio (AC3, EAC3) is only supported via pass through. DTS is only supported via pass through on both Roku set-top-boxes and Roku TV’s. You must connect your Roku player via HDMI or S/PDIF to a TV or receiver capable of decoding Dolby Digital or DTS in order to hear videos with audio tracks in those formats. 

So the best audio settings is to choose AAC stereo. Just click “Settings” icon on the interface then open a window like the below. Reset audio codec to AAC and channel to stereo. 


Subtitle Settings 

The Roku Media Player channel supports embedded subtitles in .mkv files. To choose a subtitle track use the ‘*’ button while the video is playing. 

The Roku Media Player will automatically include subtitle tracks found in .SRT files. The .srt files must be saved in the same folder as the video. They must have the same name as the video. They must have an extension of .srt. To include multiple .srt files you must insert a language extension for example movie.eng.srt or movie.ger.srt. 

So if you need subtitle, you can choose HD MKV format in the step two and change its video codec to H.265, size to 2160p in the step 3. 

Read: Hard Burn Subtitles to 1080P X264 MKV Video 

Step 4. Convert 4K Videos to Samsung TV and Roku 4 

Click the “Convert” button at the bottom-right corner of the interface to convert the 4K Video file to your Samsung smart TV and Roku 4. This 4K Video Converter will finish the 4K video to Samsung smart TV conversion in just a few minutes. 

After conversion, you can transfer all the output 4K MP4/MKV files to a USB drive and then plug the USB stick to USB port at the back of your Samsung TV. Now, you can play 4K video with Roku 4 on Samsung TV. You also can stream 4K video on Samsnug TV with Roku 4 via your home’s PC and DLNA server. 

Hot News!!: Pavtube Studio is holding on Summer Vacation Promotion. In the promotion period, you can get $10 Amazon gift card only if you are the first 30 people to buy Pavtube Video Converter Ultimate. You can contact our customers service staff after you purchased the software at support@pavtube.com. 

Related Articles: 

Format Factory vs Pavtube Video Converter Ultimate

Camille Wesley No Comments

Format Factory is a convenient utility that lets you convert files into different formats to facilitate sharing, save disk space, or make compatible with a mobile player. Meanwhile, Pavtube Video Converter Ultimate covers all the functions of Format Factory, as another best Video Converter. So when Format Factory compare to Pavtube Video Converter Ultimate, which is the winner? Now, let’s see the detailed functions of the both Video Transcoders and the difference between them.

Format Factory Alternative

No 1. Pavtube Video Converter Ultimate- Top Format Factory Alternative/Competitor

As one of the top Format Factory alternative and the strong competitor, Pavtube Video Converter Ultimate is an up-rising star which has won more and more users and has great potentials to rival Format Factory in various aspects.

  • It is fully compatible with new Windows 10 and also has Mac version for Mac users.
  • It can backup both regular, protected DVDs including Disney X-project DRM, CSS, region code, RCE, Sony ArccOS, UOPs. and DVD with region code 1/2/3/4/5/6.
  • It enable you to rip DVD to MP4, WMV, AVI, FLV, MOV, H.264, H.265, M3U8, etc, for playing on iPhone, iPad, Apple TV, Android, Samsung, HTC and more devices on the go, or watching DVDs at home on widescreen UHD TV sets via a server (NAS), streaming, etc without inserting physical discs.
  • With this Format Factory alternative, you can freely copy movie DVD to VIDEO_TS Folder and DVD to MPEG2 file.
  • It also can rip and convert Blu-ray disc, Blu-ray folder, Blu-ray ISO images.

No. 2 Format Factory- Transcoding videos and rip DVDs

Format Factory works in your computer to re-encode video to any another format and allow you to rip the DVD onto your computer.

  • Transcode video to MP4/3GP/MPG/AVI/WMV/FLV/SWF.
  • Convert Audio to MP3/WMA/AMR/OGG/AAC/WAV.
  • Rip DVD to video file and MP4 files support iPod/iPhone/PSP/BlackBerry format.
  • Repair damaged video and audio files.
  • Reducing multimedia files size.

7 Ways That Pavtube Video Converter Ultimate Goes Beyond Format Factory

Format Factory vs Pavtube Video Converter Ultimate: Ripping Ability

On account of commercial DVD often being encrypted by one or more copyright protection. Pavtube Video Converter Ultimate is definitely not a second choice. It is capable of ripping and backing up all regular DVDs including DVD movie, TV show, tutorial, etc. With the powerful DVD decryption technology, it can remove any DVD encryption including CSS, Region Code, Multi-angle, RCE, Sony ARccOS, UOP and even Disney X-Project. Pavtube Video Converter Ultimate functions more as standalone software than Format Factory.

Pavtube Video Converter Ultimate can copy the entire Blu-ray/DVD disc content to your computer hard drive with its original structure and all audio/subtitle tracks and chapter markers preserved. In addition to its full disk copy, it can also save 100% intact BD M2TS/DVD VOB movies without extras, which is called directly copy.

Besides DVD ripping, it supports protected Blu-ray converting/copying and SD/HD/4K video encoding.

While Format Factory is only a DVD decrypter and DVD copy. With it you can also decrypt BD/DVD sources to compressed ISO, TS or M2TS file and copy those audio CDs with copy protection. If you need to convert BD/DVD sources to playable video formats, an extra converting tool will be needed. Another difference is that Format Factory aims to offer greater control, all the way down to changing the speed of your DVD drive. It can remove FBI Warnings and subtitles, and does a lot for the DVD itself.

Format Factory vs Pavtube Video Converter Ultimate: Input/output supports

Input:

Format Factory: Videos and DVDs

Pavtube Video Converter Ultimate: Any DVDs with region code, CSS, Sony ARccOS, UOPs, APS, RCE, etc. including DVD folder, DVD disc, DVD ISO. Commercial and general copy-protection Blu-rays are also supported. What’s more, it allows to transcode H.265/HEVC, MP4, MKV, M4V, AVI, TiVo, MXF, MOV, and other SD/HD/4K videos.

Output:

Format Factory can save DVD or convert video to various video and audio format excluding H.265 and M3U8.

Pavtube Video Converter Ultimate output videos in MP4, MPEG, H.264, H.265, M3U8, WMV, FLV, MOV, iPod, iPhone, Apple TV, HTC, Samsung, PSP, Xbox 360, PS3, Wii, TV, etc.

Format Factory vs Pavtube Video Converter Ultimate: DVD ripping speed

Pavtube Video Converter Ultimate is “6 times faster” than Format Factory by using NVIDIA CUDA technology and AMD Accelerated Parallel Processing (APP). And Pavtube is much faster than Format Factory in movie loading, title scanning, etc.

Format Factory vs Pavtube Video Converter Ultimate: User interface

Format Factory Interface

Format Factory

Pavtube Video Converter Ultimate GUI

Video Converter

You see, as one of the most outstanding features of Pavtube Video Converter Ultimate, the preview window allows you to have a quite smooth preview of the converted video. What a brilliant video player to preview source DVD video files! While Format Factory shows with a relatively complex GUI. So, if you are not so professional in DVD ripping, Pavtube Video Converter Ultimate may suit you better.

Format Factory vs Pavtube Video Converter Ultimate: Profile Settings

Format Factory is capable of disabling unwanted movie features such as forced subtitles, forced delays, and no-skip marks, giving you full control over your movie experience. Pavtube Video Converter Ultimate allows more personal settings and provides numerous video and audio parameter settings for advanced users to alter the file size and video quality accordingly. Therefore, Pavtube Video Converter Ultimate is more suitable for advanced users.

Format Factory vs Pavtube Video Converter Ultimate: Rich editing functions

With the built-in video editor, you’re allowed to edit your DVD sources to make out your favorite movies with Pavtube Video Converter Ultimate. For example, trimming video clips, cropping unwanted images, and adding subtitles, etc. While, you need other DVD editing tools, such as CloneDVD, and all DVD playpack software to work with Format Factory.

Format Factory vs Pavtube Video Converter Ultimate: Free renewal and upgrade

As long as you have purchased Pavtube Video Converter Ultimate, you will enjoy its free renewal and upgrade for lifetime. However, you have to pay extra money for renewal and upgrade of Format Factory according to your years of use. What’s worse, Format Factory has time-limited free trial. Why not choose a more user-friendly tool with a perfect customer support?

Conclusion of Format Factory vs Pavtube Video Converter Ultimate

Well, Pavtube Video Converter Ultimate boasts excellent and fast DVD ripping feature, supports a truckload of output formats, and offers a similar intuitive Mac-style interface. The quality in the decryption rips didn’t vary as they preserved the original video. So Pavtube Video Converter Ultimate gets my vote here. Whatever, it’s your decision now. Just read the detailed comparison among Pavtube Video Converter Ultimate and Format Factory below.

Main Features

Pavtube Video Converter Ultimate

Format Factory

Supported Input Formats
(DVD disc, ISO image and DVD folder, Blu-ray files and video sources support)

√ (Blu-ray not supported)

Decrypt Copy Protection Measures
(Override any copy protection such as CSS encryption, region code, Sony ARccOS encryption, Disney X-project DRM, and more. )

Copy Feature
(Backup main title DVD, copy full title DVD)

Supported Output Formats
(Rip DVD to a swathe of formats like MP4, MOV, AVI, FLV, WMV, MPEG, MKV, H.264, etc)

Supported Devices
Rip DVD movie to iPhone, iPad, iPod, Samsung Galaxy, Kindle Fire HD, Xbox 360, PSP, etc)

Snapshot
NVIDIA CUDA/AMD APP acceleration
Forced subtitles
Batch conversion
Video preview

Edit Function
(Trim video to get the favorite segment of the movie, crop the video to better suit your iPad and other mobile devices, add external subtitle to make movie understandable, and add watermark to make it personalized.)

Support & Help
Free renewal & upgrade

Mac version

Verdict:

If you need a more powerful all-in-one Blu-ray Ripper + DVD ripper + Video Converter + Audio Converter that provides more output formats and profiles (as many as 200+), please try Pavtube Video Converter Ultimate with outstanding features and unique functions.

Wanna save your money? Please go to www.multipelife.com/special-offer to find your desirable bundles. And you won’t regret!

Related Software:

BDMagic for Windwos/Mac – The best Blu-ray solution to rip and backup any commercial and region-locked Blu-ray to H.265, M3U8, MP4, MKV, AVI, FLV, etc.

DVDAid for Windows/Mac – Capacity of ripping copy-protected and homemade DVD to iPhone 6S, iPad, Surface Pro, Synology NAS, Seagate Wireless Plus, etc with suitable format.

ByteCopy for Windows/Mac – It can rip Blu-ray/DVD in multiple languages to lossless MKV keeping multi-track subtile/audio and all chapter markers.

Related Articles:

Summer Holiday Promotion – Buy One Blu-ray Ripper Get a Video Converter Free in Pavtube

Camille Wesley No Comments

It’s prime time for travel, especially for families with kids who are on summer break from school. The sun, the beach, the pleasant evenings — there’s nothing better. Not to mention all the great summer festivals and events, from farmers markets to Fourth of July fireworks and parades. So in the hot Summer Vacation, what can Pavtube Studio give you to help you have a nice summer time?

Pavtube Gift in Summer Vacation – Pavtube ByteCopy:

  • Bypass the encryption from Blu-ray/DVD discs
  • 1:1 backup Blu-ray/DVD with original video structure
  • Convert Blu-ray/DVD to lossless MKV, MP4, AVI, WMV, 3GP, H.265, etc.
  • Adjust A/V parameters
  • Edit Blu-ray/DVD videos.

In what Scene you need ByteCopy?

Scene One:

You have a plan to fly to Hawaii from the Los Angeles Area with kids? OK, it will take you about 4-5.5 hours. Did you think about the way to spend the time? Have a nice sleep in the airplane? Trust me, to you, it maybe a good idea but not your kids. Try to copy some Blu-ray and DVD blockbusters to your iPads, Galaxy tablets then your children can enjoy a movie they love in the air and have a rest in the rest time.

watch blu-ray dvd on galaxy tab 3

Related Guides:

Scene Two:

No long-distant traveling but a near-distance camping? So what do you plan to do in the evening, just take a walk on the grass? Come on, come some movies, please. Image that, silence sky, peaceful surroundings, gentle breeze, then you and your families are watching a movie that you don’t have time to watch before. How a warm memory!

Related Guides:

To reward the customers, Pavtube Studio decides to offer a server that if you buy Pavtube ByteCopy for Windows/Mac now, you can get any one video converter in the below chart free. These video converter can help you convert your camera/camcorder MXF, AVCHD, XAVC, MOV, MP4, MTS, RAW video to any video editing tool, media player, etc.

Price: $42, Buy ByteCopy Now  

Read : Pavtube summer promotion 

Free Video Converter You can Get

Get Free One

Related guides

Highlights

Pavtube Video Converter for Windows/Mac

  • Convert 4K video with H.265/MXF/XAVC/XAVC/Prores/MP4 formats 
  • Output 3D Video for 3D TV, VR Headsets

Pavtube HD Video Converter for Windows/Mac

  • Convert HD video including AVCHD, Tivo, H.264, MXF, XAVC, XAVC S, etc 
  • Output professional codec for NLE programs

Pavtube MTS/M2TS Converter for Mac

  • Support Sony/Canon/Panasonic MTS /M2TS files 
  • Product Professional editing codec for NLE

Pavtube MXF Converter for Mac

  • Support Sony XDCAM/Panasonic P2/Canon XF MXF 
  • Convert MXF to virtually any file foramts 
  • Generate professional codec from MXF from NLE

Pavtube iMixMXF

  • Keeping multiple audio tracks/channels in multi-track MKV/MP4/MOV format 
  • Mix multiple audio tracks/channels into one

After you purchased Pavtube ByteCopy, please connect our customer service staff at support@pavtube.com. Then you can get a registration code for the video converter free. The activity will expire on 31 August.

Related Articles:

Comparison of Popular DVD Rippers in the Market

Camille Wesley No Comments

Want to watch your DVD movies on your iPhone or Android phones with MX Player? The latest DVD-ripping utilities fare surprisingly well at handling both new and older movies. DVD Ripper can remove DVD copy protection and shift the formats from disc-based content to digital version format for your  iPhone SE, Nexus 6P, iPhone 6S Plus, Samsung Galaxy Note 5, LG G5, HTC 10, iPhone 7, Galaxy S7, etc.

DVD Ripper

DVD ripping software also can solve DVD can’t playing on VLC problem and with DVD backup, you can play your DVD movies on many other desktop media players or mobile handsets media player like KM Player, QuickTime, Windows Media Player. And you can store DVD rips onto NAS, External Hard Drive, Media Server then stream DVD movies on HD Media Player, TV Boxes like Apple TV, Popcorn Hour, Xtreamer SideWinder 2, WD TV Live Plus wirelessly or via USB port. Speaking too many benefits of ripping DVD, so which one is the best DVD ripper tool to help you get DVD rips?

In the market, there are so many DVD ripping softwaresl that can break the copy protection and extract the movie title off the disc. Too many choices makes people confuse which one they should choose. So here this article lists some popular DVD ripper softwares capable of ripping and converting DVD discs, ISO image files or DVD folders to computer, mobile handsets and media players supported file formats and put things in perspective to convenient to pick out the suitable one for you.

System support/minimum-requirements, interface & programmin

This table lists the operating systems that different DVD rippers can run on without emulation and/or compatibility layer(s).

DVD Ripper Program
Provider
Supported OS
License
Pavtube ByteCopy Pavtube Studio Windows XP, Vista, 7, 8, 8.1, 10, MacOS,
Shareware
Pavtube BDMagic Pavtube Studio Windows XP, Vista, 7, 8, 8.1, 10, MacOS,
Shareware
Aimersoft DVD Ripper Aimersoft Studio Windows XP, Vista, 7, Windows 8, 10
Shareware
Freemake Video Converter Ellora Assets Corporation Windows XP, Vista, 7, 8, 8.1
Freeware
Pavtube DVDAid Pavtube Studio Windows XP, Vista, 7, 8, 8.1, 10, MacOS,
Shareware
Leawo DVD Ripper Leawo software Windows XP, Vista, 7, 8, 8.1, 10
Shareware
Magic DVD Ripper Magic DVD Software Windows XP, 2000, 2003, Vista, Windows 7, Windows 8
Shareware
HandBrake The HandBrake Team Windows Vista, Windows 7, Windows 8, 8.1, MacOS, Linux (Ubuntu)
Open source GNU
Xilisoft DVD Ripper Ultimate Xilisoft Corporation Windows XP SP2, Vista, Windows 7, Windows 8 (not official support)
Shareware

Disabling DRM

DVD Ripper Region RCE key2Audio UOP CSS Macrovision CPRM FluxDVD Fortium Protect ARccOS AACS BD+ ROM Mark BD-Live
AnyDVD
Yes
Yes
Yes
Yes
Yes
Yes
No
Yes
Yes
Yes
Yes
Yes
Yes
Yes
Partial
CloneDVD
No
No
No
No
No
No
No
No
No
No
No
No
No
No
No
Handbrake
No
No
No
No
No
No
No
No
No
No
No
No
No
No
No
Pavtube ByteCopy
Yes
Yes
Yes
Yes
Yes
Yes
Yes
Yes
Yes
Yes
Yes
Yes
Yes
Yes
Yes
Pavtube BDMagic
Yes
Yes
Yes
Yes
Yes
Yes
Yes
Yes
Yes
Yes
Yes
Yes
Yes
Yes
Yes
DVD Decrypter
Yes
No
No
Yes
Partial
Partial
No
No
No
No
No
No
No
No
No
Pavtube DVDAid
Yes
Yes
Yes
Yes
Yes
Yes
Yes
Yes
Yes
Yes
Yes
No
No
No
No
DVD Shrink
Yes
No
No
Yes
Partial
Partial
No
No
No
No
No
No
No
No
No
FormatFactory
Yes
No
No
Yes
Yes
Yes
No
No
No
No
No
No
No
No
No
MacTheRipper
Yes
Yes
No
Yes
Partial
Partial
No
No
No
No
No
No
No
No
No
RipIt
Yes
No
No
No
Yes
Yes
No
No
Yes
Yes
Partial
Partial
No
No
No
DVD X Copy
Yes
No
No
Yes
Partial
Partial
No
No
No
No
No
No
No
No
No

Input files supported

Program
DVD Disc
ISO Image File
DVD Folder
IFO File
Pavtube ByteCopy
Yes
Yes
Yes
Yes
Pavtube BDMagic
Yes
Yes
Yes
Yes
Xilisoft DVD Ripper Ultimate
Yes
Yes
Yes
Yes
WinX DVD Ripper Platinum
Yes
Yes
Yes
No
Pavtube DVDAid
Yes
Yes
Yes
Yes
Magic DVD Ripper
Yes
No
Yes
No
Leawo DVD Ripper
Yes
No
Yes
No
Freemake Video Converter
Yes
No
Yes
No
Aimersoft DVD Ripper
Yes
Yes
Yes
Yes

Output files

Program
Audio
Video
Common Video Formats
HD Video Formats
4K Video Format
3D Video Formats
Pavtube ByteCopy
Yes
Yes
Yes
Yes
Yes
Pavtube BDMagic
Yes
Yes
Yes
Yes
Yes
Aimersoft DVD Ripper
Yes
Yes
Yes
Yes
Yes
Leawo DVD Ripper
Yes
Yes
Yes
Yes
Yes
Pavtube DVDAid
Yes
Yes
Yes
Yes
Yes
Xilisoft DVD Ripper Ultimate
Yes
Yes
Yes
No
Yes
Freemake Video Converter
Yes
Yes
No
No
No
Magic DVD Ripper
Yes
Yes
No
No
No
WinX DVD Ripper Platinum
Yes
Yes
Yes
No
No

The compare result performed in the table presents that the DVD ripping programs developed by Pavtube Studio, like Pavtube ByteCopy and Pavtube BDMagic, performs well. Pavtube DVDAid is a little weaker than the former two but is still more powerful than the open source Handbrake. In addition, WinX DVD Ripper and Aimersoft DVD Ripper are sole good choices.

About Legality

When the material being ripped is not in the public domain, and the person making the rip does not have the copyright owner’s permission, then such ripping may be regarded as copyright infringement. However, some countries either explicitly allow it in certain circumstances, or at least don’t forbid it. Some countries also have fair use-type laws which allow unauthorized copies to be made under certain conditions. As mentioned above, circumventing copy protection mechanisms, such as the encryption used on most commercial DVDs, may also be illegal in many countries.


Related Articles:

Top Blu-ray Ripper Comparison – Rip BD to VLC/Plex

Camille Wesley No Comments

Many Media Players claimed that they can play Blu-ray such as VLC. And normally PS4 also can stream Blu-ray. It seems that you have multiple ways to play your Blu-ray collections. But lower version VLC will get failure while playing Blu-ray and PS4 can’t play a Blu-ray with the different region codec from the PS4 manufactured region. Anyway, there is always something that prevent you from streaming Blu-ray movies. In this case, a Blu-ray Ripper can help you solve all the problems.

A Blu-ray Ripper can help you rip Blu-ray to VLC, decrypt Blu-ray to WMP, convert Blu-ray to Plex, copy Blu-ray to PS3/PS4, backup Blu-ray to QuickTime, re-encode Blu-ray to KMPlayer/MX Player and many other media players supported format video so you can stream your Blu-ray movies without any hassle even you don’t have a Blu-ray Player. With some excellent Blu-ray Rippers like Pavtube ByteCopy, you even can rip Blu-ray with 5.1 or 7.1 surround sound only if your original Blu-ray has.

With so many benefits, would you get interested in a Blu-ray Ripper? Do you know which one is the best you can get to help you rip/decrypt/convert Blu-ray? Here we gathered top Blu-ray Ripping software and gave you a comparison chart to help you learn the difference among all the professional Blu-ray Rippers.

Disabling DRM

Blu-ray ripper Region AACS UOP DRM HDCP BD+ BD-ROM
Pavtube ByteCopy Yes Yes Yes Yes Yes Yes Yes
Pavtube BDMagic Yes Yes Yes Yes Yes Yes Yes
ImTOO Blu-Ray Ripper Yes Yes ? ? ? Yes Yes
Aiseesoft Blu-ray ripper Yes Yes ? Yes ? Yes Yes
UFUSoft Blu-ray ripper Yes Yes ? Yes ? Yes Yes
Ideal Blu-ray Copy Yes Yes ? ? ? Yes Yes
Magic Blu-ray Copy Yes Yes Yes Yes Yes Yes Yes
AVCWare Blu-ray Ripper Yes Yes Yes Yes Yes Yes Yes
1CLICK BLURAY COPY Yes Yes ? Yes ? Yes Yes
DVDFab Blu-ray Copy Yes Yes Yes Yes Yes Yes Yes
Xilisoft Blu-ray Ripper Yes Yes ? Yes ? Yes Yes
Leawo Blu-ray Copy Yes Yes ? ? Yes Yes Yes
4Videosoft Blu-ray Ripper Yes Yes ? Yes Yes Yes Yes
Aimersoft Blu-ray Ripper Yes Yes ? ? ? Yes Yes

Supported Blu-ray

Blu-ray Ripper Blu-ray Disc BDMV Folder M2TS File Blu-ray ISO
Pavtube ByteCopy YES YES YES YES
Pavtube BDMagic YES YES YES YES
ImTOO Blu-Ray Ripper YES NO YES NO
Leawo Blu-ray Copy YES YES YES YES
AVCWare Blu-ray Ripper YES NO YES NO
4Videosoft Blu-ray Rippe YES YES NO NO

Supported Output Files

Blu-ray Ripper MP4 MKV AVI MOV M4V Multitrack 3GP WMV FLV H.265 MPEG WebM M3U8 4K
Pavtube ByteCopy YES YES YES YES YES YES YES YES YES YES YES YES YES YES
Pavtube BDMagic YES YES YES YES YES NO YES YES YES YES YES YES YES YES
ImTOO Blu-Ray Ripper YES YES YES YES YES NO YES YES YES NO YES NO NO NO
Leawo Blu-ray Copy NO NO NO NO NO NO NO NO NO NO NO NO NO NO
AVCWare Blu-ray Ripper YES YES YES YES YES NO YES YES YES NO YES NO NO NO
4Videosoft Blu-ray Rippe YES YES YES YES YES NO YES YES YES NO YES YES NO NO

Features

Blu-ray Ripper Full Copy Directly Copy Edit Reset 2D/3D-3D Add Subtitle Extract Subtitle Forced Subtitle GPU Acceleration
Pavtube ByteCopy YES YES YES YES YES YES YES YES YES
Pavtube BDMagic YES YES YES YES YES YES YES YES YES
ImTOO Blu-Ray Ripper NO NO YES YES YES NO NO NO YES
Leawo Blu-ray Copy YES YES NO NO YES NO NO NO NO
AVCWare Blu-ray Ripper NO NO YES YES YES NO NO NO NO
4Videosoft Blu-ray Ripper NO NO YES YES YES NO NO NO YES

Verdict:

You can choose any one to help you get more Blu-ray enjoyment on media players. But if you ask which one is the best bargain, I stronly recommend Pavtube ByteCopy <review> with the following reasons: GPU Acceleration, original quality preserving, 5.1/7.1 audio keep, lossless MKV output, stability on Windows 10, (Mac version on El Capitan), wide various output formats and devices presets, etc.

Related Articles:

Rip Blu-ray to use on D-Link Boxee Box

Camille Wesley No Comments

The D-Link Boxee Box links to your network and connects to your TV or A/V receiver by way of its HDMI port to deliver high-definition audio and video (1080p). It supports a huge number of media codecs but not includes Blu-rays. If you want to stream Blu-ray via D-Link Boxee Box, you can rip Blu-ray to D-Link Boxee Box supported digital files. 

To copy Blu-ray to D-Link Boxee Box for playing, you can use a Blu-ray Ripper. You can try to use Pavtube ByteCopy for Windows/Mac to rip Blu-ray to Boxee supported format like AVI, MP4, WMV, MKV, etc. In this way it gives pretty sharp image when streaming the movies from Boxee to HDTV. 

More Features of ByteCopy 

* Rip any Blu-rays/DVDs/ISO to Boxee in MP4, FLV, AVI, MOV, H.264, H.265M3U8, WMV, AAC, etc.  

* Backup Blu-rays/DVDs to multi-track MKV for Boxee with lossless quality and preservation of all audio tracks, subtitles and chapter markers, etc.  

* Rip Blu-ray/DVD to Boxee with forced subtitle, desire subtitle/audio tracks  

* Edit Blu-rays/DVDs/ISO: Trim, crop, merge videos, add watermark and subtitle etc.  

Extract SRT Subtitles from Blu-ray disc, BDMV and ISO file  

* Constantly update to decrypt the latest Blu-rays, DVDs  

Free download and install: 
  

Rip Blu-ray to use on D-Link Boxee Box 

Step 1: On a Windows PC, insert the Blu-ray Disc to optical drive, run Blu-ray Ripper. Follow these steps to rip BD/DVD for Boxee: 

1. Click “File” to crack copy-protection and import Blu-ray Disc 
2. The main title is checked automatically so you don’t need to check other chapters. 
3. From “Audio” and “Subtitles” box, set desired language. 


Step 2: Boxee supports the following common container formats- AVI, MPEG, WMV, ASF, FLV, MOV, and MKV. These formats you can find in “Common Video” and “HD Video” category. For a DLNA based media streaming device like D-Link Boxee, MPEG-4 .mp4 is the best format because it’s optimal for streaming between both home devices and mobile devices. 


The Pavtube ByteCopy lets users to adjust output video quality and file size. Click “Settings” button, then you will be able to adjust all the settings in the following window, including codec, aspect ratio, bit rate, frame rate, sample rate and audio channel. 

Step 3: Click “Convert” button to start to rip Blu-ray to D-Link Boxee. When the process ends, just open the output folder to locate the generated MP4 files for Boxee. 

Copy Blu-ray rips to the folder shared with Boxee Media Manager and then you can play movies instantly and stream them to iPad Pro, iPad Air, PS4, HD TV and other devices. If you own a D-Link Boxee box, you can also transfer movie rips to an USB stick and lets the box plays Blu-ray rips from the USB storage. 

Related Article

Rip Blu-ray to NAS for HiMedia Q5/Q10 Pro Playing with Kodi

Camille Wesley No Comments

Popular Media Box have OHC, Nvidia Shield TV and HiMedia Q5/Q10 Pro. Since HiMedia Q5/Q10 Pro support Kodi and various video codec, it attracts a mass of users. What’s more, it can connect with NAS, so you can copy your large Blu-ray collections to NAS then stream it with HiMedia Q5/Q10 Pro via Kodi. 

HiMedia Q5/Q10 Pro supports only Blu-ray ISO and MPEG1/2/4, H.264/AVC, H.265, so you can rip Blu-ray to H.264/H.265 MP4 to NAS for HiMedia Q5/Q10 Pro playing via Kodi. Surely, you also can rip Blu-ray to ISO but ISO image is the original structure of the disc, which will keep large size. If you have too many Blu-rays and want to put to NAS for HiMedia Q5/Q10 Pro playing, the best choice is H.265 MP4. H.265 video save half bandwidth with the same video quality with H.264 video and Kodi supports H.265, too. 

How to rip Blu-ray to H.265 to put on NAS for HiMedia Q5/Q10 Pro Playing with Kodi? 

To copy Blu-ray to H.265 for HiMedia Q5/Q10 Pro, you need a Blu-ray Ripper that can bypass encryption on Blu-ray discs and output H.265 codec video. Pavtube ByteCopy for Windows/Mac is recommended here. It can easily rip Blu-ray to any HiMedia Q5/Q10 Pro Playing supported video and stream to Kodi. 

Key Features of ByteCopy 

  • Rip any commercial Blu-ray discs with various difficult encryption protection
  • Keep original video quality. You can’t see any difference between the original Blu-ray videos and the Blu-ray rips.
  • Convert Blu-ray to MPEG1/2/4 video for HiMedia Q5/Q10 Pro and Kodi playing via NAS.
  • Convert Blu-ray to H.264/AVC MP4, MKV, WMV, MOV, etc video for HiMedia Q5/Q10 Pro and Kodi playing via NAS.
  • Convert Blu-ray to H.265 MP4/MKV video for HiMedia Q5/Q10 Pro and Kodi playing via NAS.
  • Allows people to adjust video and audio codec, resolution, bitrate, frame rate, etc.
  • Rip Blu-ray with forced subtitle, 5.1/7.1 audio.
  • Big Feature: rip Blu-ray to lossless MKV and multi-track MP4/MOV/AVI
    preserving multiple subtitle and audio tracks.
  • Convert 2D/3D Blu-ray to 3D MKV, MP4, WMV for Himedia Q5/Q10 Pro playback.


Free download and install: 
  

Steps to Copy Blu-ray to NAS for HiMedia Q5/Q10 Pro Playing with Kodi 

Step 1: Load Blu-ray movies 

Click “File”drop-down list and select “Load from disc”to import your Blu-ray movies to the program. You can choose desired subtitle and audio track at bottom of the chapter list. You also can keep forced subtitle in the process of Blu-ray to Kodi/HiMedia Q10 Pro. 


Step 2: Choose H.265 for Kodi/HiMedia Q10 Pro 

Click “Format”bar, from its drop-down list, as Kodi support many 3D mode and format, here, you can choose to select “MP4 Side-by-Side 3D Video(*.mp4)” as the desired output format for playback on Kodi/HiMedia Q10 Pro. You can also choose other 3D mode and formats according to your own needs. 


P.S. If you like, you can click “Settings” to change the video encoder, resolution, frame rate, etc. as you wish. Keep in mind the file size and video quality is based more on bitrate than resolution which means bitrate higher results in big file size, and lower visible quality loss, and vice versa. 


Tip: 

If your Blu-ray movie has no the subtitle you want, you can add external subtitle to your Blu-ray movies. Click “Edit” in menu bar, you can add your mother tongue subtitle downloaded from opensubtitles.org by clicking “subtitle”.Just hit other function icons, they will surprise you. 


Step 3: Start Blu-ray to Kodi/HiMedia Q10 Pro conversion. 

When all the setting is done, begin the conversion process by clicking the right-bottom “Convert”button to start to convert Blu-ray to Kodi/HiMedia Q10 Pro supported SBS 3D video. 

Then put the Blu-ray rips to your NAS and stream Blu-ray movies on Himedia Q5/Q10 Pro with Kodi. 

Specifications / Caractéristiques du Q5/Q10 PRO (source Himedia) 

HI3798CV200 Quad-core 64-bit high-performance ARM Cortex A53 with NEON  
High-performance multi-core GPU Mali T720 with OPENGL ES3.1 supported  
Android 5.1 running on 1080P resolution  
Perfect playback compatible up to 250Mbps 4K UHD movie  
H.265/HEVC 10bit maximum 4K x 2K@60 fps  
H.264/VC1/MPEG4/MPEG2/VP9/VP8/VP6/AVS video decoding  
HDMI 2.0a output upto 4K x 2K@60 fps  
Imprex 2.0 Processing Engine with HDR,Dolby vision supported  
Support 7.1 HD Audio passthrough : DOLBY TRUEHD, DOBLY ATMOS, DTS-HD  
Support 192K/24bit audio decoding and output  
Support video post-processing advanced setting  
DSD/SACD audio decoding and passthrough  
BDMV/BDISO lite Navigation  
3D Bluray subtitles supported  
USB3.0 interface  
SATA3.0 interface  
1000M LAN(support remote wakeup and standby via ethernet)  
802.11ac wifi bluetooth  
Support firmware local update and OTA online update  
KODI and ADD-ONs online update  
SKYPE,YOUTUBE,NETFLIX,FACEBOOK,PLAY STORE,CHROME BROWSER  
LED Display with high white backlight  
Support 6TB harddisk  
Support SAMBA, NFS network playback  
Remote control with mouse function for use by all Andorid apps  
Private Mould designed for excellent heat dissipation 

——————————– 

Video Formats (Codecs) : MPEG1/2/4, H.264/AVC, H.265, VC-1, REALVIDEO 8/9/10 
Audio Formats (Codecs) : MP3, WMA, AAC, APE, FLAC, WAV, DTS, Dolby Digital, AC3 up to 7.1. 
3D SBS : Yes 
3D Top Bottom :Yes 
3D Frame Packing :Yes 
Blu-Ray 3D : Yes 
DVD ISO : Yes 
Blu-Ray ISO : Yes (BD-Lite) 
Dolby Digital Downmix :Yes 
Dolby Digital Passthrough : Yes 
Dolby TrueHD Downmix : Yes 
Dolby TrueHD Passthrough : Yes 
DTS Downmix : Yes 
DTS Passthrough : Yes 
DTS-HD MA Downmix : Yes 
DTS-HD MA Passthrough : Yes 

Related Articles: 

ByteCopy for Mac 4.8.6.6 Retail + Crack

Camille Wesley No Comments

ByteCopy for Mac 4.8.6.6 2016 Crack Full Version Download 


Pavtube ByteCopy for Mac is a powerful program with the ability of backing up Blu-ray/DVD collection to multi-track MKV, ripping BD/DVD movies to MP4 and MOV with multiple audio streams, and converting BD/DVD from hard discs to virtually any popular video and audio format like m3u8, H.265, MKV, etc. so that you can freely watch movies on iPhone 6S, Galaxy S7 and other portable devices. It also allows you create 3D SBS MP4 from 3D Blu-ray for Gear VR, Oculus Rift DK 2, Oculus Rift CV1, ZEISS VR One, etc and 3D TVs. 


ByteCopy for Mac 4.8.6.6 Features 

1. Various output presets. Pavtube ByteCopy supports converting BD/DVD to virtually any popular video and audio format: H.264/MPEG-4, DivX, XviD, MKV, MP4, AVI, MPEG, WMV, FLV, SWF, F4V, MOV, 3GP, 3G2, VOB, TS, DV, MPEG-2 HD Video (*.mpg), MPEG- TS Video(*.ts), Quick Time HD Video (*.mov), WMV HD Video (*.wmv), Audio-Video Interleaved HD Video (*.avi) 

2. Lossless/uncompressed MKV option and multiple soft audio tracks & subtitles. ByteCopy offers a lossless MKV and multi-track MP4/MOV/AVI presets with multiple audio streams. 

3. Additional editing functions This multi-track Blu-ray/DVD converter can be considered as a user-friendly movie editing tool with the professional functions to trim, crop, merge, insert subtitles, export srt/ass/ssa subtitles, add video effects in the target movie. 

4. Copy Blu-ray/DVD with 1:1 Quality and protection removed. You can easily rip off Blu-ray encryption, then backup a 1:1 Blu-ray folder that is exactly the same as original or directly Copy main movie from BD/DVD discs and leave out extras. 

What’s new in this version: 

  • Improve SRT subtitles extraction
  • Add Samsung/LG/Panasonic/Sony TV preset.
  • Support TrueHD audio
  • Be compatible with latest Blu-ray&DVD movies
  • Fix some bugs


System Requirements: 

  • 1G Hz or above Intel processor.
  • Snow Leopard (10.6), Lion (10.7), Mountain Lion (10.8), Mavericks (10.9), OS X Yosemite (10.10)
  • 1GB physical RAM (memory) or above.
  • 1024*768 or higher resolution display.
  • Optical Drive: DVD drive(BD drive is required for ripping Blu-ray disc)


ByteCopy for Mac 4.8.6.6 Download: 

– Pavtube New official address: http://www.multipelife.com/downl … /bytecopy_setup.dmg 
– Pavtube old official address: http://www.pavtube.cn/bytecopy-mac/ 
– – Cnet Download: http://download.cnet.com/Pavtube-ByteCopy/3000-7970_4-76177783.html 
– Softpedia Download: http://pavtube-bytecopy-for-mac.en.softonic.com/mac 
– Freedownloadmanager Download: http://en.freedownloadmanager.org/Mac-OS/Pavtube-ByteCopy-for-Mac.html 

View 3D Movies on Gear VR/Oculus Rift/HTC Vive/ZEISS VR One/Microsoft Hololens/Razer Osvr/Google Cardboard

Camille Wesley No Comments

VR is the future or a flash in the pan? Who cares? We only know VR devices gives us normal people a chance to enjoy a Virtual Reality world at home. In the world, we can see the dragons in the Jurassic Park, fell the passion in The Martian strongly. What’s more, with more and more VR Headsets manufactured, a VR Headset is getting more and more cheap. Even the hot Samsung Gear VR is priced at approachability. So with a VR headset in hand, do you really know how to play your own 3D video on your VR Headset?

When you get your first VR box in hand, you must be confused how the black box can give you a VR world. Here, we will show you how to watch a 3D movie with a VR Headset, even it is a low end VR Headset at home.

Here’s what you’ll need:

A 3D movie. Please remember: If you turn a 2D movie in a 3D one, none of your existing 2D titles will work. You need to download a true 3D video from YouTube and other 3D movie sites or you can buy a 3D Blu-ray movie than rip it to right 3D SBS video for your VR Headsets.

A phone. iPhone or Android, either one will work. We’re going to assume your phone fits nicely into the VR headset you have on hand.

A VR headset. We used the Samsung Gear VR available for $98 on Amazon. (Other VR Headsets choices)

A VR Video Player: The one extra thing you might need, depending on the 3D movie you have, is an app to play it for the VR headset. The reason you need a special app to play a 3D movie because when you play any sort of video that’s meant for a VR headset, it’s split into two windows like this;

We say you might need the app because the movie may not be split into two windows. The one we tried this out with was already split into two windows. In the event that your movie isn’t, here are some free apps, one for iOS and Android each, to split the view.

VR Video Player app for iOS users:

Homido 360 VR Player – Homido itself is a VR headset maker and it has its 360 VR Videos player app too!. The Homido 360 VR Player is a really cool app for iPhone users to watch 3D SBS & 360 VR Videos.

Mobile VR Station for iOS iPhone – Mobile VR Station is another alternative or similar app to Homido 360 VR Player. It perhaps has even more features than Homido!

Carl Zeiss VR One Cinema – Carl Zeiss one of World’s best lens maker recently came out with a VR Headset and Carl Zeiss VR One Cinema app comes directly from the company.

VR Video Player app for Android users

VR Player – This VR video player can effectively play the 2D, 3D Top-Bottom, 3D SBS videos on your smartphone. If you are interested in having the experience of theatre with your smartphone, then you must install the VR Player in it.

VR Gesture Player – The most amazing feature of the app is that the inputs are made through hand gestures. The touch-less control of this app lets the users to jump into the world of virtual reality. The hand gestures are recognized by the back camera and these gestures are used to control the app.

VRTV Player Free – This player app features all the projection types like dome, cube, and more that are required to play the VR videos. Fish Eye is the best feature of this player which lets the users to split the videos in such a way that there is no strain on your eyes.

If you’ve got a movie that’s already split into two windows, just play it using VLC player.

Create 3D Video, Transfer Video to phone, Play 3D with Gear VR

Create 3D Video

As we aforementioned, the 3D movie is a key point for successfully playing 3D video with 3D VR Glasses.

You can download true 3D movie from popular 3D movie download sites. Top 3D movies download sites have:

  • YIFY Torrents
  • The Illustrated 3D Movie List
  • The Pirate Bay
  • forfree3d.com
  • Kickass
  • YouTube 3D Channel

You also can buy 3D Blu-ray/DVD and rip 3D Blu-ray/DVD to 3D SBS Video for VR Headsets with 3D Blu-ray Ripper.

Download and install a 3D Blu-ray Ripper: Windows Pavtube 3D Blu-ray Ripper, Mac Pavtube 3D Blu-ray Ripper

Open Blu-ray to Side-by-Side 3D converter and load your source Blu-ray movie. From the “Format” drop-down list, you are suggested to follow the path “3D Video > MP4 Side-by-Side 3D Video(*.mp4)”for ripping Blu-ray to side-by-side 3D MP4 video. Finally, click the “Convert” button on program interface to start ripping Blu-ray to side-by-side 3D MP4 video. After it finished, open output file destination, locate the created SBS 3D MP4 video and you could watch it on your VR Headsets.

Important Tips:

3D depth and video size, bitrate is very important for a 3D video effect. You HAVE TO check the user manual of your VR Headsets to learn the best compatible 3D video codec, frame rate, bitrate, audio codec, channel. AND, since the phone is the screen, you should make sure the 3D video is also supported by your iPhone 6S/6S Plus/6/6 Plus/5S/5, Samsung Galaxy S7/S7 Edge/S6/S6 Edge/Note 5/4, Blackberry, HUAWEI, LG, HTC, etc.

Supported video and audio format of iPhone, Samsung Galaxy phone, Android smartphone.

For Gear VR, we recommend using 1280×720 HD resolution to encode your videos. Higher resolutions will not provide any better quality, meaning you’ll waste space and processing power.

We also recommend using a higher bit rate than a typical web stream at that resolution, as the pixels in your video will be magnified on the phone’s screen. The optimal bit rate is content dependent, and many videos can get by with less, but 5 Mb/s should give good quality.

While H.264 is the recommended video coding, H.265 videos can also be played.

3D movies should be encoded “full side-by-side” with a 1:1 pixel aspect ratio. Content mastered at 1920×1080 compressed side -by- side 3D should be resampled to 1920×540 resolution full side -by -side resolution.

When you don’t make sure the best 3D video parameters, just keep 3D Video resolution 720p or 540p.

Transfer Video to phone

I think this step is very easy for you. If you don’t know, please read the tutorial by yourselves.

To view your SBS 3D video files on your Gear VR with Galaxy S7/S7 Edge/S6/S6 Edge/Note5/Note 4, follow these steps:

  1. On your MicroSD card file directory, navigate to Oculus > Movies > Your Movies
  2. Create a new folder within “Your Movies” and label it “3D”
  3. Import or move your side-by-side 3D videos into your newly created “3D” folder

Since Galaxy Note 5 has no MicroSD card, you can simply connect it to your computer to transfer your 3D video to it.

Play 3D with Gear VR

Once you have created your 3D content folder and imported compatible video files, insert your MicroSD card into your Galaxy phone (if it isn’t already), dock the phone in your Gear VR, and don the virtual reality headset. Then:

  1. Navigate to Oculus Cinema from the main menu
  2. Navigate to “My Videos” from the Oculus Cinema content library menu
  3. Select the 3D video you wish to view (if you followed the above steps it should have a “3D” label in the upper righthand corner)
  4. Choose the cinema mode to begin playback

The software is coded to automatically convert any video in the “3D” folder for 3D playback. While the included documentation and tutorials don’t make the process completely obvious, the answer is buried in the literature accompanying the Gear VR’s Oculus Mobile SDK along with plenty of other tips on importing your own content for viewing on Samsung’s virtual reality headset.

This 3D video playing on VR Headsets tutorial is applied to nearly all VR Headsets in the market no matter it is a lower end or higher end one only if it needs a smartphone as the display. You can follow the steps to view 3D movie on Gear VR Innovator Edition, Gear VR, Oculus Rift DK2, Rift Development Kit 2, Google Cardboard, Cardboard HeadMount 3D VR BOX, Daydream VR, ZEISS VR One, ANTVR KIT, Vitrio VR, Freefly VR, View-Master VR, DESTEK Vone 3D VR Headset, IncrediSonic M700 VUE Series VR Glasse, Baoer Cardboard Valencia Quality 3d VR, Glyby 3D VR, VIGICA VR, True Depth 3D VR, J-DEAL Large FOV 3D VR, HTC Vive, Homido Virtual Reality Headset, Findbest VR, Speck Pocket VR, Deepoon VR, Visus, Cmoar  VR, AuraVisor, Project Morpheus, PlayStation VR, etc.

Related Articles: